
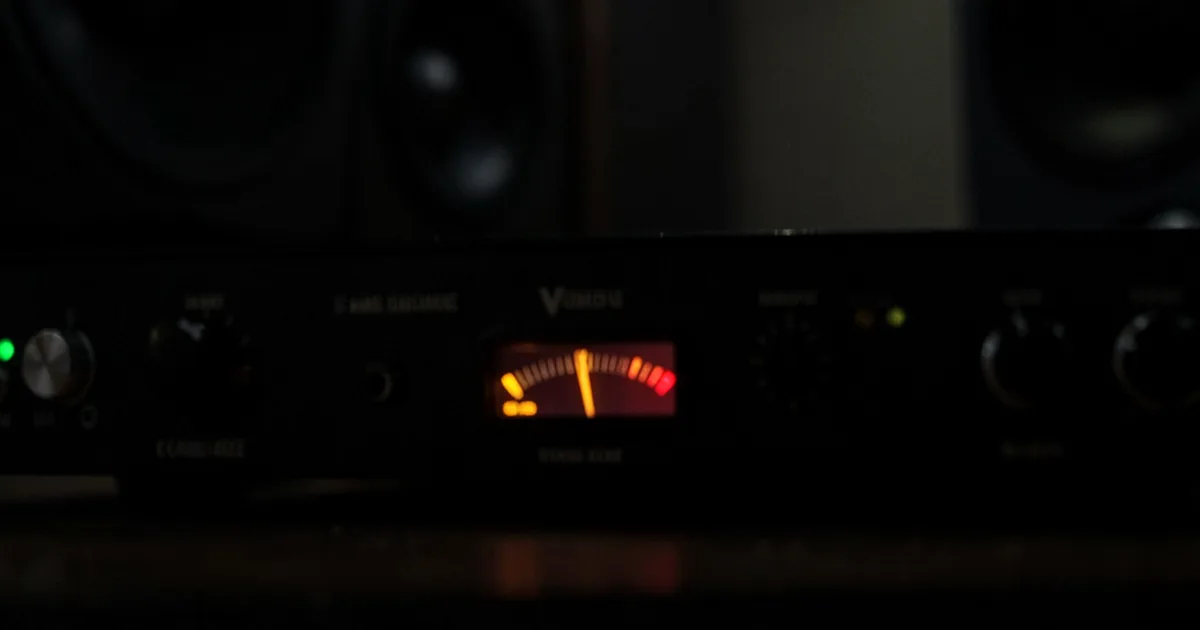
A compression plugin reduces the dynamic range of your audio by turning down signals that exceed a set threshold. The type you need, FET, optical, VCA, or multiband, depends on what you're compressing and what you want it to do to the sound.
Compression is the most misunderstood tool in any signal chain. Not because it's complex. Because it's invisible. You can't see what it's doing the way you can see an EQ curve. You have to learn to hear it, and that takes time most tutorials don't give you.
This guide fixes that. We cover every major compression type, the settings that actually matter, how to chain compressors for genre-specific results, and where multiband goes wrong. We also tell you which plugins are worth buying and which ones we'd skip.
We've tested well over a hundred compressors across Logic, Ableton, Pro Tools, and Reaper. This is what we know.
What Do the Core Parameters Actually Do?
Before you pick a compressor type, you need to understand what you're controlling. These four parameters run every compressor you'll ever touch.
Threshold and Ratio
Threshold sets the level at which compression starts. Signal above that line gets compressed. Signal below it passes through untouched.
Ratio sets how hard the compressor clamps down. At 2:1, a signal that exceeds the threshold by 10dB only rises 5dB at the output. At 8:1, that same 10dB only rises 1.25dB. At 20:1 or above, you're in limiting territory.
For vocal levelling, we start at 4:1. For peak limiting on a mix bus, we'd go 10:1 or higher. For gentle glue on a drum bus, 2:1 keeps things natural.
Attack and Release
Attack controls how fast the compressor responds to a signal crossing the threshold. The range matters: 0.010ms is nearly instant, while 250ms lets most transients through untouched.
Slow attack (30ms+) lets the initial transient punch through before gain reduction kicks in. That's what gives drums their crack. Fast attack (0.1ms or below) catches everything, which can sound strangled on percussive material.
Release controls how fast the compressor lets go after the signal drops below threshold. Too fast, and you get pumping. Too slow, and you lose the space between phrases.
We ran a snare through Waves CLA-76 with the attack set to 0.8ms and release at 200ms. The attack was dead. No snap. We pushed attack to 6ms. The stick hit came back. That one change made it sit in the mix where it was hiding before. Frustrating how long it takes to hear that the first time. Satisfying once you do.
What's the Difference Between FET, Optical, and VCA Compression?
Compression type determines character. Same settings, different results. Here's how each one behaves.
FET Compression
FET stands for field-effect transistor. These compressors are fast and aggressive. The UA 1176 is the standard reference: it comes in three revisions (Rev A, Rev E, and the 40th Anniversary), each with a slightly different harmonic fingerprint, but all built for speed.
For vocals, we target 3–6dB of gain reduction with a 4:1 ratio, attack between 1ms and 5ms, and release between 50ms and 100ms. That setting catches peak energy without killing the performance.
FET compressors add odd-order harmonic saturation when pushed. That's the "bite" people describe. In measurable terms, it's 3rd and 5th harmonic content above 2–3kHz. Use that on rap vocals, electric guitar, snare. Avoid it on things you need to stay clean.
Optical Compression
Optical compressors respond to a light-dependent resistor. The circuit physically can't respond instantly, so the attack and release are program-dependent. They breathe with the music rather than following rigid settings.
The LA-2A is the archetype. It has two controls: Peak Reduction and Output. That's it. We plugged an acoustic guitar bus through Waves CLA-2A, set Peak Reduction at about 40%, and it smoothed the whole performance in 30 seconds without touching a single timing parameter. Optical compression is what you reach for when you want things to sit without thinking hard about why.
Works brilliantly on bass. Underrated on room mics. Not the right call for sharp transient shaping.
VCA Compression
Voltage-controlled amplifier compressors are the most precise and most transparent type. The SSL G Bus Compressor is the standard for mix bus work. The dbx 160 is the standard for aggressive tracking.
VCA compressors respond predictably to any setting you dial in. That makes them the right call for mix bus glue. We use 2:1 ratio, slow attack (30ms), auto release, with 2–3dB of gain reduction on the mix bus. That's the SSL setting that's been on ten thousand hit records. It works because it's subtle. You miss it when you bypass it, even if you couldn't describe what it was doing.
How Does Multiband Compression Work (and When Should You Avoid It)?
Multiband compression splits your signal into frequency bands and applies independent compression to each one. A plugin like Waves C6 or iZotope Ozone's Dynamics module might give you 4–6 bands, each with its own threshold, ratio, attack, and release.
That sounds like more control. It is. But it's also four or six ways to make a mess.
The Phase Problem Nobody Talks About
Every crossover point in a multiband compressor introduces phase shift. When the compressor in one band activates and the adjacent band doesn't, the phase relationship between those two bands changes dynamically. The result is smearing at crossover frequencies.
We ran a drum bus through a preset-loaded multiband compressor and compared it to a VCA bus compressor doing the same amount of gain reduction. The multiband version had a blurred low-mid (around 250–400Hz) that made the kick sound less defined against the bass. The VCA version was tighter by a clear margin.
Linear-phase multiband modes (available in Fabfilter Pro-MB and iZotope Ozone) eliminate phase shift but introduce latency. We measured 60–80ms of latency in linear-phase mode on Pro-MB, which rules it out for live tracking scenarios. In mixing, you can compensate for that. In a live session, you can't.
When Multiband Is the Right Call
Multiband earns its place in mastering and problem-solving. If a bass guitar has a resonant peak at 80Hz that only compresses during certain notes, a targeted multiband approach solves it without touching the rest of the frequency range. That's the job. Solving specific, frequency-dependent dynamic problems.
What it's not for: general mix bus "glue". Don't load a preset and bounce. You'll wonder why your mix sounds like it's been ironed flat.
Should You Chain Compressors? Serial vs. Parallel Explained
Single compressor does one job. Two compressors in series do two different jobs without either working too hard. That's the idea.
Serial Compression
Serial means one after the other in your signal chain. Common approach: a fast FET compressor first to catch peaks (3–4dB of reduction), followed by a slow optical or VCA compressor for tonal shaping and levelling (another 3–4dB).
We use this on lead vocals constantly. The 1176 emulation catches the spiky consonants. The LA-2A smooths the phrases. Neither one is working hard. Total gain reduction adds up to 6–8dB across both, but it sounds more natural than 6–8dB from a single compressor because the character is split between two different circuit types.
Parallel Compression (New York Style)
Parallel compression blends a heavily compressed version of a signal with the unprocessed dry signal. The dry signal keeps the transients and dynamic life. The compressed signal adds density and sustain underneath it.
For drums, we'll send the room bus to a parallel chain with a VCA compressor at 10:1, fast attack, slow release, bringing the gain reduction to 15–20dB. Then blend that compressed signal back in at about 30% wet. The kick still punches. The room sounds three times bigger. Clever processing when you want power without suffocation.
Sidechain Routing: Beyond the Basics
Most producers know the kick-to-bass sidechain for pumping effects. That's not what we're talking about here. Internal sidechain EQ is the underused version.
High-pass the sidechain input of your vocal compressor at 120Hz. Now low-frequency content in the vocal (room rumble, plosives) won't trigger the compressor. The compressor only responds to the frequency range you want it to track. FabFilter Pro-C 2 and DMG Compassion (check the manufacturer's site for current pricing on both) both have sidechain EQ built into the interface. Worth learning.
Worth Bookmarking
- Sweetwater's Compression Basics, practical breakdown of core parameter relationships with audio examples.
- iZotope Learn: Compression Basics, pairs well with Ozone's multiband dynamics module documentation.
- Attack Magazine Dynamics Archive, deeper genre-specific compression breakdowns.
- Reaper Plugin Latency Testing, measure exactly how much latency your compressors add in your DAW.
- FabFilter Pro-C 2 Manual, the most clearly written plugin manual we've seen. Read the section on lookahead and auto-gain.
Stock DAW Compressors vs. Third-Party Plugins: Is It Worth Spending Money?
Ableton's Glue Compressor is an SSL G Bus emulation that does the job. Logic's Vintage VCA and Vintage FET are better than most producers give them credit for. Pro Tools' stock compressors are ugly and we'd replace them immediately.
The honest answer: stock compressors will get you 70–75% of the way there on most material. The gap between a good stock compressor and a well-modelled third-party plugin narrows every year.
Where third-party plugins genuinely separate themselves: harmonic accuracy in analog emulations, workflow speed (FabFilter Pro-C 2's visual feedback alone saves hours of guessing), and CPU efficiency at scale. TDR Kotelnikov is free and outperforms paid options at mix bus duties. That's our free pick. Arturia's compressor collection (check their site for current pricing) covers FET, optical, and VCA across six hardware models. That's our value pick. FabFilter Pro-C 2 at $179 is the most flexible single-compressor purchase you can make if you do varied work.
For CPU: we measured FabFilter Pro-C 2 at approximately 0.4% CPU per instance in Ableton on an M1 MacBook Pro. Logic's stock Vintage VCA ran at 0.1%. That difference matters if you're running 40 compressor instances. It doesn't matter if you're running six.
How Do You Set Compression for Specific Instruments?
Generic settings produce generic results. Here's where we'd start on common sources.
Drums
Kick: slow attack (25–40ms), fast release (40–60ms), 4:1 ratio, 4–6dB gain reduction. Keeps the beater click. Adds weight to the sustain.
Snare: FET-style compressor. 6:1 ratio, attack at 3–8ms, release at 80–120ms. Target 4–8dB of gain reduction. Push the ratio to 10:1 and crank the input if you want the 1176 "all-buttons-in" smash sound.
Drum bus: VCA at 2:1, 30ms attack, auto release, 2–3dB gain reduction. That's it. Don't overthink the drum bus.
Bass Guitar
Optical compression is our first call. LA-2A style, medium Peak Reduction, targeting 4–6dB of gain reduction. It smooths the note-to-note level variations without the aggressive character of a FET hitting a bass track.
For heavy genres where you want the bass to cut through a dense mix: VCA with a 4:1 ratio, 10ms attack, 80ms release. That keeps the pick attack and compresses the body.
Lead Vocals
Our standard serial chain: 1176-style FET at 4:1, 2ms attack, 60ms release, catching 3–5dB of the hardest peaks. Followed by an LA-2A style optical at medium compression, adding another 3–4dB of smooth levelling. High-pass the sidechain input at 120Hz on both.
Summary
Compression controls dynamics. FET compressors are fast and characterful. Optical compressors breathe with the program material. VCA compressors are precise and transparent. Use them for the right job, not interchangeably.
Multiband compression solves frequency-specific dynamic problems. It's not a mix bus treatment. Phase artifacts at crossover points will cost you definition if you're not careful.
Chain compressors in series to split the workload. Use parallel compression to add density without losing transients. Filter your sidechain input to stop low-end from hijacking your compressor's detection circuit.
Start with TDR Kotelnikov if you're working free. Move to FabFilter Pro-C 2 when you need more flexibility. Learn the settings before you load a preset.
Part of our complete Music Production Plugins Guide: Complete Beginner's Overview series.
Frequently Asked Questions
What ratio should I start with for vocal compression?
Start at 4:1 for most lead vocal work. That gives you meaningful gain reduction without squashing the performance. If you're tracking a singer with very consistent dynamics, 2:1 or 3:1 may be enough. Push to 6:1 or above only if you're going for an obviously compressed, in-your-face effect.
What's the difference between a limiter and a compressor?
A limiter is a compressor with a very high ratio, typically 10:1 or above. At these ratios, almost no signal gets through above the threshold. Limiters are used on master buses to catch peaks before they clip and on individual channels where you need a hard ceiling. Compressors at lower ratios (2:1 to 8:1) are for shaping dynamics across a wider range.
Does compression add latency?
It depends on the mode. Standard compressors with lookahead disabled add near-zero latency. Enable lookahead (available in FabFilter Pro-C 2, DMG Compassion, and others) and you introduce latency equal to the lookahead time, typically 1–20ms. Linear-phase multiband modes add significantly more: we measured 60–80ms in FabFilter Pro-MB's linear-phase setting. That's fine for mixing, not for live tracking.
Is parallel compression better than serial compression?
They do different jobs. Parallel compression adds density and sustain while keeping transients alive. Serial compression shapes dynamics in two stages with less strain on either compressor. We use serial for vocals and parallel for drums. You can combine both: serial FET and optical on a vocal chain, plus a parallel bus underneath for body.
When should I use multiband compression?
Use it to solve specific, frequency-dependent dynamic problems. A resonant low-mid in an acoustic guitar that only spikes during certain chord shapes, for example. It's not a general-purpose mastering tool for beginners. If you're reaching for a multiband preset to "glue" your mix, try a VCA bus compressor first. Cleaner results, faster.
What's the best free compression plugin?
TDR Kotelnikov. It's genuinely accurate on a mix bus, has a clear interface, and handles low-level detail compression as well as plugins that cost $150+. Tokyo Dawn Records also makes TDR Molot GE, which models a Soviet-era hardware unit with character to spare. Both are free. Both live on our shortlist.
How much gain reduction should I be applying?
For transparent levelling: 3–6dB is the target on most sources. Above 8–10dB of constant gain reduction and you'll usually hear the compressor working, which may or may not be what you want. On a mix bus, we'd aim for 2–3dB maximum. The goal in most cases is that bypassing the compressor feels like a loss, not that the compression is audible as its own effect.