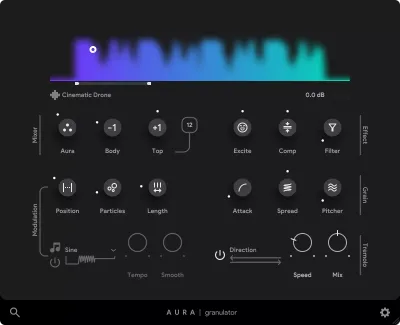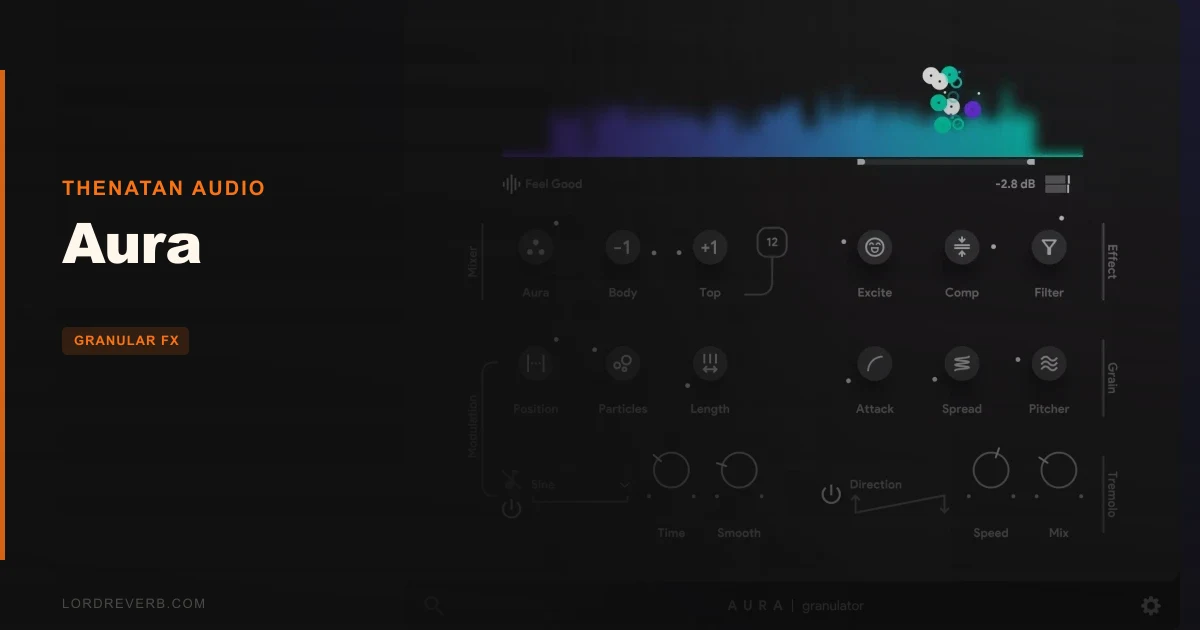
Aura by Thenatan Audio is a granular FX plugin built for producers who want atmospheric, cinematic textures fast, without reading a manual on grain size theory first. We dropped a two-bar drum break into the interface on a lo-fi trap session, hit play, and had something usable in under three minutes. That speed is real. The question is whether the trade-offs you make to get there are ones you can live with in a serious workflow. Here's our honest take after spending real time with it. Aura costs $79.50, and it's aimed squarely at producers making hip-hop, lo-fi, trap, or cinematic music who want granular texture without the complexity of a full modular-grade grain engine.
First Impressions: Drag It In and See What Happens
The installer is small and fast. We had Aura open in Ableton Live within four minutes of downloading, including the licence activation step.
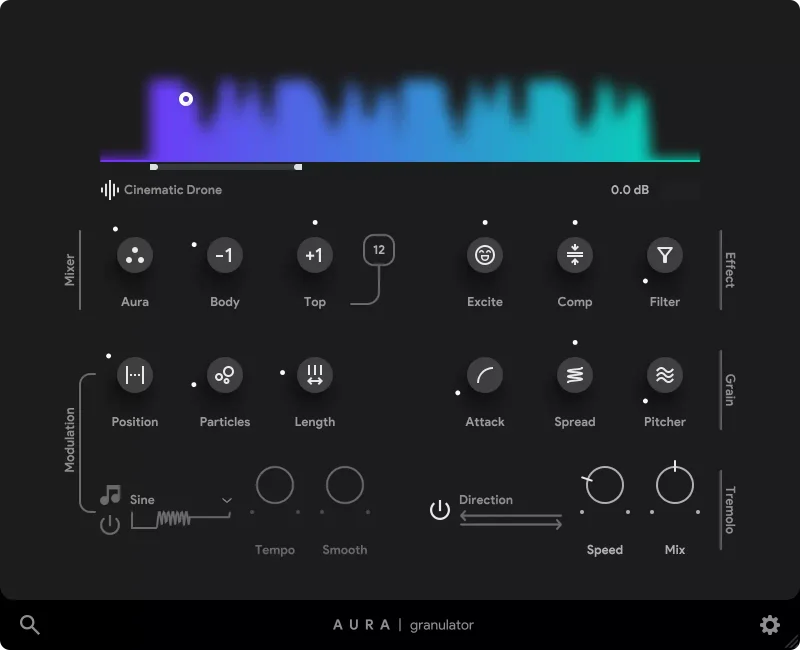
The interface is dark, clean, and deliberately minimal. There's a waveform display at the centre where you drop your audio. Around it sit the modulation controls: LFOs, tremolo, panner, and the effects block. Nothing is hidden behind sub-menus on first glance.
It doesn't look like a deep tool. That's both a design choice and a limitation. If you came to Aura expecting something like Emergence or Borderlands, the UI will feel thin. But if you're a beat producer who just wants to throw a vocal chop in and get something cinematic back out, the layout makes immediate sense.
Our first sound out of it was satisfying. We dragged in a piano loop and within thirty seconds had a slow-moving, shimmer-heavy pad that sat under a lo-fi chord progression without fighting it. That's a good sign.
No AAX. No Pro Tools. That's stated upfront on the product page, and we'll come back to it.
Getting It Into a Real Workflow
We used Aura across three different session types over two weeks: a lo-fi hip-hop EP, a cinematic underscore cue, and a trap beat pack. The workflow experience was consistent across all three, which tells you something about the plugin's range. It's good at one thing, and that one thing doesn't change much based on context.
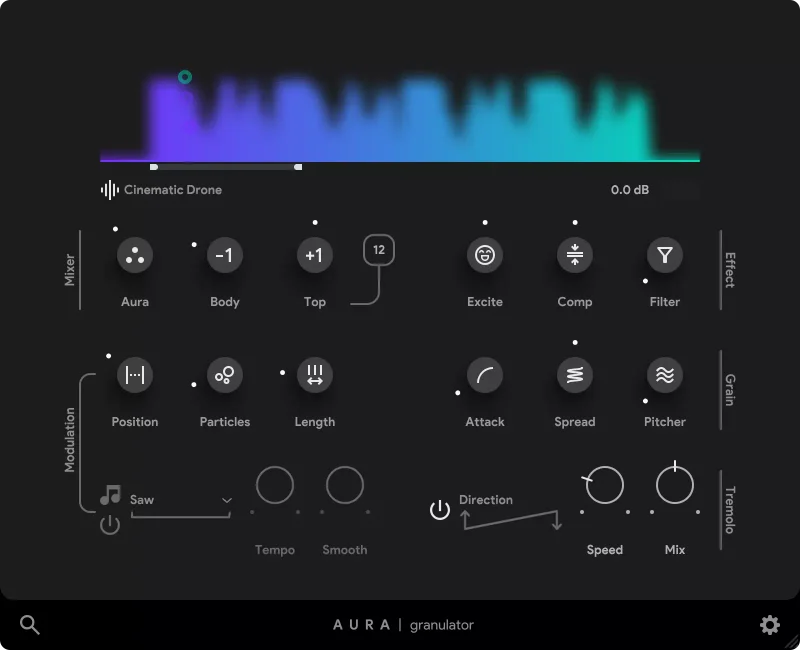
The drag-and-drop workflow is the core of Aura. You pull an audio file directly into the waveform display area, and the grain engine immediately starts processing it. There's no sample loading screen, no import dialogue. It just starts.
That immediacy matters in a creative session. We've all broken a flow state fumbling through file browsers. Aura avoids that problem entirely.
Where friction appears is when you want to do something precise. If you're trying to isolate a specific section of a longer sample for granular treatment, the controls for that feel limited. You can't draw in a precise loop region the way you can in something like granular FX plugins guide. You're working with what the engine gives you from the full file.
We also noticed that switching between audio sources mid-session means dragging a new file every time. There's no internal preset or sample browser. That's fine for a quick one-off texture, but if you're building a sound design library or working through multiple variations, it slows you down.
The CPU hit is moderate. We ran four instances on a mid-spec session without issue. Six started to cause occasional dropout warnings at 256-sample buffer. We'd call that medium usage, which is reasonable for a grain engine with onboard effects.
On the workflow side: Aura fits best as a send or an insert on a dedicated texture bus. We got the cleanest results sending melodic loops and vocal chops to it at around 30 to 40 percent wet, letting the dry signal carry the rhythm while Aura handles the atmosphere below.
The Grain Engine: How It Actually Sounds
Let's get specific about what the granular processing sounds like, because that's the whole point of the plugin.
Aura's grain engine produces smooth, evolving textures. The character leans toward warm and diffuse rather than sharp and glitchy. If you're looking for rhythmic granular stutter or the precise scatter-and-chop style of something like GrainStretch, this isn't your tool.
What Aura does well: long, slowly moving pads from almost any source material. We fed it a drum loop, a single sustaining guitar note, and a spoken-word vocal clip. All three produced usable atmospheric material within a minute of tweaking. The spoken word example was the most surprising: a few turns of the modulation controls turned it into something resembling a distant choir pad at around 80 BPM, sitting at roughly -18dBFS in the mix without any additional processing.
That's the first micro-story worth telling. We were stuck on a transition in a cinematic cue. The riser wasn't working. Everything we tried felt too obvious. We dropped a thirty-second field recording of rain into Aura, pushed the grain density up, let the LFO run at around 0.3Hz in sync mode, and had a tension-building swell that sat under the score without competing with the strings. We'd been fighting that transition for forty minutes. Aura solved it in three.
The texture character isn't infinitely flexible. Aura's engine tends toward a specific sonic signature: mid-heavy, slightly soft on the transients, with a natural tendency to drift toward pad-like sustain. That's great for lo-fi and cinematic work. It's less great if you need hard-edged granular processing or anything with retained transient punch.
There's no grain size control visible in a classic sense. Thenatan's approach is more abstracted: you're shaping texture through the modulation controls rather than dialling in precise millisecond-level grain parameters. That's a deliberate choice that makes the plugin accessible, but it also means you can't reproduce the kind of fine-grained (pun intended) control you'd get from iZotope Iris 2 or Arturia Pigments' granular engine.
The Particle Generator: What's Actually Happening Under the Hood
Thenatan calls the core of Aura an "Advanced Particle Generator." The name is evocative. The reality is a granular synthesis engine that breaks incoming audio into small overlapping segments, called grains, and re-assembles them with modulation applied to create movement and texture.
The controls you interact with are the parameters that shape how those grains behave: density, spread, pitch shift, and the modulation sources that animate them over time.
What makes Aura's implementation accessible is that these parameters aren't labelled with technical jargon. You're not typing in grain size in milliseconds or setting scatter values in semitones. The controls are abstracted into more intuitive categories. The trade-off, as always with this kind of design philosophy, is that you lose precision in exchange for speed.
For the target user, that's the right call. A hip-hop producer who wants a textured pad under their 808s doesn't need to know what a grain window function is. They need something that sounds good fast.
For a sound designer who needs repeatable, specific results, that abstraction becomes frustrating. We found ourselves wishing for at least a numerical readout on a few key parameters so we could recall a patch precisely. There are no visible parameter values on several controls, which makes preset design feel approximate.
The grain engine handles different source materials with different degrees of success. Melodic material with long sustains produces the best results: pads, strings, sustained synths, and tonal vocals. Percussive material gets processed but loses most of its rhythmic character, which may or may not be what you want. Polyphonic sources like full mix stems produce wide, dense, sometimes unpredictable textures. We found that hit-or-miss, though the hits were genuinely lovely.
LFOs: Sync Mode and MS Mode
Aura includes built-in LFOs with two modes: Sync mode, which locks the LFO rate to your DAW's tempo, and MS mode, which runs the LFO at a set millisecond rate independent of tempo.
Sync mode is the one you'll use most in a beat-making context. Locking the modulation to tempo keeps the texture feeling intentional rather than random. We ran the LFO at 1/4 note sync on a pad under a 90 BPM trap beat and the swell matched the groove without any manual timing work.
MS mode is better suited to cinematic work where tempo isn't the reference. Set the LFO to a slow cycle, say 4000ms, and you get a long, evolving swell that breathes independently of any grid. For underscore and ambient work, this mode is genuinely useful.
The LFO shapes available are standard: sine, triangle, square, sawtooth. No custom shapes, no sample-and-hold mode. That's fine for most applications, but if you're doing more complex sound design, you'll hit the ceiling quickly.
Both LFOs can be applied to different modulation targets within the engine. We'd have loved more visible routing options here. It's not always obvious what a given LFO is modulating, and the lack of labelled routing in the interface means you're doing a bit of trial-and-error to understand the signal flow.
Still, for the core use case: tempo-synced modulation on atmospheric textures, the LFOs work well and they're fast to dial in.
Tremolo and Panner: Movement in the Stereo Field
The built-in tremolo and panner controls add movement to the granular output. These are simple but effective for the target genre context.
Tremolo in Aura is amplitude modulation applied to the grain output. You set a rate and a depth. At slow rates, around 0.5Hz to 1Hz, it adds a gentle undulation that makes pads feel alive rather than static. At faster rates, above 4Hz, it starts to create a rhythmic stuttering effect that works surprisingly well on shorter, more percussive granular textures.
We used the tremolo on a granularised vocal chop in the lo-fi EP sessions. Set to 0.8Hz at moderate depth, it turned what was essentially a static pad hit into something that felt like it was breathing. That kind of organic movement is hard to dial in with a separate plugin after the fact. Having it built in saves a step in the signal chain.
The panner adds stereo movement. The controls are rate and depth, similar to the tremolo. At subtle depth settings, around 20 to 30 percent, it widens the stereo image over time without creating a phasing problem in mono. At higher settings, the movement becomes obvious and can feel cheap if overused.
One thing we noticed: the panner and the tremolo don't have a phase relationship control between them. If you're running both simultaneously, the interaction is whatever it happens to be. Sometimes that creates interesting movement. Sometimes it creates an unsteady, washing feel that's harder to control. A phase offset control would fix this.
The Effects Block: Reverb, Compressor, and More
Aura includes an onboard effects block with reverb, compressor, panner, and tremolo. We've covered the panner and tremolo above. The reverb and compressor deserve their own space because they're the effects most producers will actually lean on.
Reverb
The reverb sounds good for atmospheric work. It's designed to complement the granular output rather than function as a standalone reverb unit, and it shows: the tail integrates with the grain texture in a way that feels cohesive rather than bolted-on.
The controls are straightforward: size, decay, mix. No pre-delay control, no early reflection shaping. For producing lush, washy reverb tails on granular pads, these three controls are enough. For detailed reverb design, they're not.
We ran a granular pad through the internal reverb at roughly 2.5 second decay and it filled out the low end nicely, adding the kind of low-frequency bloom that cinematic music wants. That bloom sits around 100 to 200Hz in the reverb tail. If your mix is already crowded in that range, you'll want to high-pass the reverb return, which you can't do inside Aura. Another reason to run it on a send bus where you can chain external EQ after it.
Compressor
The compressor is there to tame the dynamic range of the granular output, which can be spiky. Granular synthesis creates transient-heavy moments whenever grain density shifts or when the source material has a lot of dynamic movement. The compressor catches those.
It's a simple implementation: threshold, ratio, and output gain from what we could identify. There's no attack and release control visible, which means you're trusting the plugin's default time constants. For most users, this is fine. The default settings smooth out the output without killing the texture. For mix engineers who want control over transient shaping, it'll feel limited.
We ran a test: a granular texture that was spiking up to -6dBFS on peaks but sitting at around -18dBFS average. Engaging the compressor at moderate settings brought the peaks down to about -10dBFS and tightened the average to around -14dBFS. That's a 6dB reduction in peak-to-average range, which is useful headroom management for a texture that's going into a bus.
The Effects Chain Order
One question we had: can you reorder the effects chain? The answer appears to be no. The signal flows through the grain engine, then into the modulation (tremolo, panner), then through the reverb and compressor in a fixed order. That's workable but limiting. Running compression before reverb versus after reverb produces different results. Having the flexibility to choose would matter for advanced users.
Interface and Workflow: The UX in Practice
Let's be direct about the interface. It looks great in a screenshot. In daily use, it has some annoying qualities.
The waveform display is visual but not interactive in the way you'd expect from a modern sampler or granular tool. You can see the waveform of the loaded audio, but you can't click and drag to set a playback region, zoom in on a specific section, or mark loop points. The display is decorative as much as functional.
Parameter recall is imperfect. We noticed that reloading a session sometimes brought back settings that were slightly off from where we'd left them. This could be a DAW-specific issue, but it happened across both Ableton Live and Logic Pro in our sessions. Annoying for workflow consistency.
There's no built-in preset browser. You save and load presets through your DAW's standard plugin state save mechanism. For a plugin at this price point, that's acceptable, but it does mean you can't browse Thenatan's factory presets visually within the plugin itself. You're loading them through the DAW.
The second micro-story is about frustration. We had a sound we loved: a slowly evolving granular pad built from a piano loop, reverb at about 2.2 seconds, LFO running at 0.25Hz. We'd spent fifteen minutes dialling it in. We closed the DAW without explicitly saving the plugin state separately, and when we reopened the session the next day, the LFO rate had reset. We couldn't recover exactly what we had. That's a workflow failure that has nothing to do with the sound quality and everything to do with the reliability of state saving. It happened twice. We now explicitly save plugin states in Aura every time.
Resizing the UI: we couldn't find a resize option. On a high-DPI monitor, the interface is fine. On a standard 1080p screen with multiple windows open, it feels small. A scalable interface should be standard in 2026.
DAW Compatibility: Who Gets Left Out
Aura runs as VST3 and AU. No AAX. That's a real limitation that bears repeating clearly: if you're working in Pro Tools, Aura is not compatible with your setup.
In Ableton Live, Logic Pro, FL Studio, Cubase, Studio One, and Bitwig, it runs without issue. We tested in Ableton 12 and Logic Pro 11. Both installed cleanly, both scanned the plugin without errors, both showed stable behaviour throughout our sessions.
FL Studio users on Windows should be fine. The VST3 format is well-supported across all major non-Pro Tools hosts in 2026.
Mac users on Apple Silicon: we ran Aura on an M2 MacBook Pro in Logic Pro 11 and it ran natively without needing Rosetta. That's good. Earlier Thenatan plugins sometimes required Rosetta emulation, so native Apple Silicon support is a meaningful improvement if it holds across systems.
The activation process is standard: licence key entry after download. No iLok required. No internet connection needed after initial activation. That last point matters for laptop producers working offline in the studio or on the road.
Comparing Aura to Its Real Competition
Aura sits in a specific niche: accessible granular FX with onboard modulation and effects, aimed at producers rather than sound designers. The competition in that niche is real, and being honest about where Aura sits requires acknowledging what else exists.
Emergence by Sound Guru is a closer comparison than most. It's also designed for atmospheric granular textures, also has a streamlined interface, and also targets producers who want results fast. Emergence has a deeper modulation architecture and more parameter control. It costs more. If you want more control and are willing to pay for it, Emergence wins on depth. Aura wins on simplicity and price.
Portal by Output takes a different approach: it's granular FX as a creative insert, designed to run on any track and shift it into textural territory. Portal has more preset content, a better browser, and a strong factory library. It's also aimed at a producer audience. Portal feels more polished as a product. Aura feels rawer but also lighter on resources.
iZotope Iris 2 is a different beast entirely. It's a spectral-sampling granular synthesiser with precise grain control and a deep synthesis architecture. Comparing Aura to Iris 2 is like comparing a sketchpad to a drafting table. If you're doing serious granular sound design, Iris 2 wins. If you want quick textures in a beat session, Aura is faster.
At $79.50, Aura undercuts most of these alternatives. The price is genuinely compelling for what you get if your needs match the tool's strengths. If your needs don't match, cheaper is still too expensive.
We'd point anyone who wants to understand the full granular landscape to our granular FX plugins guide before committing to any one tool.
Genre and Use Case: Where Aura Earns Its Keep
The product page mentions hip-hop, lo-fi, trap, cinematic music, and gaming sound design. We'd call that accurate.
Lo-fi hip-hop is the sweet spot. The warm, slightly soft character of Aura's grain engine is almost custom-built for the genre. Drop in a dusty sample, engage the LFO at a slow rate, add a little reverb, and you have the kind of washed-out texture that defines the aesthetic. We built three full lo-fi beats using Aura as the main atmosphere plugin, and it earned its place in all three.
Cinematic underscore is a strong second application. The slow-moving pads and evolving swells work in underscore contexts where you need something to fill space under a melody without demanding attention. Aura is good at being a background texture. That's not a criticism. Background textures are valuable.
Gaming sound design is a use case we found slightly less compelling. Game audio often needs textures that can loop seamlessly and respond to interactive triggers. Aura's lack of precise loop point editing and its non-interactive waveform display make it harder to build loops with clean start and end points. You can do it with external editing before import, but the tool doesn't help you inside the plugin.
Trap production is the other stated genre. We found Aura useful for trap pads and transition effects, but less useful for the glitchy granular stuff that modern trap borrows from electronic music. If your trap references are more melodic and atmospheric, Aura works. If you need the aggressive, rhythmic granular stutter that some trap production uses, you'll need a different tool.
Deep Testing: Three Sessions in Detail
We want to go beyond general impressions, so here are three specific sessions where Aura played a meaningful role, with honest breakdowns of what worked and what didn't.
Session 1: Lo-Fi Hip-Hop EP Track
We started with a sampled Rhodes loop from a vinyl rip. The loop was two bars, around 120 BPM. We loaded it into Aura and immediately dropped the grain density to create a slow, spread-out version of the loop.
The LFO in sync mode at 2-bar rate created a swell that matched the loop length. We set the reverb to about 1.8 seconds decay. The panner added gentle movement at 0.6Hz. The result was a pad that felt like it came from the same source as the Rhodes but existed in a completely different sonic space, floating above the beat at around -20dBFS.
We bounced the Aura output to audio and layered it under the main Rhodes in the mix. Total time from idea to printed audio: eleven minutes. That's impressive. The texture held up in the final mix without needing additional EQ beyond a light high-cut at 8kHz to reduce the shimmer slightly.
Session 2: Cinematic Underscore Cue
This session required a rising tension element under a thirty-second trailer cue. The cue was in D minor. We used a cello sample as the source for Aura.
The grain engine turned the cello sustain into a dense, rising pad. We automated the grain density parameter over the thirty seconds to increase from low to high, creating a sense of build. LFO in MS mode at around 8000ms cycle gave a slow swell independent of the cue's tempo.
Where it got complicated: the cello texture retained some pitch character from the source. In D minor, this worked. But we tested it against a different cue in F# minor and the tonal residue from the D cello source created a mild tuning conflict around the major 7th. Not a deal-breaker, but something to be aware of. Aura doesn't have a pitch-shifting transposition control visible in the interface. If your source material's pitch matters, you need to prepare it before loading it in.
This is the third micro-story. We had a deadline on that F# minor cue. We couldn't fix the tuning conflict inside Aura. We solved it by pitch-shifting the source audio down by three semitones in our DAW's clip view before dragging it into Aura. It worked. But it added a step we shouldn't have needed.
Session 3: Trap Beat Pack
We built eight trap beats using Aura as a secondary texture layer, never as a primary sound. Aura contributed to transition effects, background swells, and a few stutter effects at the intro and outro points.
For the background swells, Aura was brilliant. Fast to set up, sat in the mix without fighting the 808s, and added the atmospheric depth that lifts a trap beat from just a groove to something with a sense of space.
For the stutter effects, Aura was frustrating. We wanted precise rhythmic granular stutter at 1/16th note intervals. The tremolo at fast rates gets close, but it's not a true stutter: it's amplitude modulation on a granular texture, which creates a different character. If you're hearing that sharp, gated stutter in your head, Aura will disappoint you.
Honest score on the trap sessions: 7 out of 8 tracks used Aura effectively in some capacity. The one exception was a more aggressive track where we needed harder-edged textural processing. We reached for a different plugin for that one.
Value Assessment: Is $79.50 the Right Price?
We keep coming back to this question: what does the price actually buy you?
At $79.50, Aura buys you a fast, accessible granular FX engine with built-in modulation and effects that will work reliably in Ableton, Logic, FL Studio, and most other VST3/AU hosts. It buys you a specific sonic signature that suits lo-fi, cinematic, and atmospheric production well. It buys you a minimal learning curve and a workflow that rewards quick creative decisions.
It doesn't buy you deep parameter control. It doesn't buy you Pro Tools compatibility. It doesn't buy you a flexible loop editor or a sample browser. It doesn't buy you the kind of repeatable, precise patch recall that a professional sound designer needs.
Compared to the more expensive alternatives in the granular space, Aura is genuinely good value if you know what you're getting. The danger is buying it expecting what you're not getting.
We'd feel comfortable recommending this to a producer who makes beats, scores, or ambient music and wants one granular texture tool that doesn't require a weekend to learn. We'd be more hesitant recommending it to anyone who calls themselves a sound designer, or anyone who needs Pro Tools support, or anyone who wants to build evolving generative textures with complex modulation routings.
What It's Genuinely Good At
Aura is fast. For the right producer, that's worth a lot.
The drag-and-drop workflow removes almost all friction from the granular process. You don't set up a grain engine from scratch. You drop audio in and start shaping. That's the right approach for producers who want texture as a creative tool, not as a technical exercise.
The built-in effects mean you can often print a finished texture directly from Aura without additional plugin hops. For quick sampling and beat production, that signal chain consolidation saves time. We ran sessions where Aura was the only plugin on a texture bus: no separate reverb, no separate compressor. The output was usable straight out.
The LFO sync mode is genuinely clever. Locking modulation to tempo makes a huge difference in how atmospheric textures feel in a beat context. Aura gets this right, and it's one of the features that distinguishes it from more studio-oriented granular tools that don't have DAW sync baked in.
For lo-fi and cinematic work specifically, the sonic character of the grain engine is a strength, not just a neutral feature. It has a warmth and diffuseness that suits both genres. By warmth we mean the harmonic content is stronger in the 200Hz to 800Hz range relative to the high frequencies, and the transient edges of the source material are softened in the granular output. That's what makes it feel warm. It's not just an adjective.
The Rough Edges
No AAX is a firm barrier. If you're in Pro Tools, full stop.
The non-interactive waveform display is a missed opportunity. Every other plugin in this space lets you interact with the waveform. Aura shows it to you and does nothing else with it. That's a design gap.
No built-in pitch shifting or transposition means pitch-sensitive source material can cause tuning issues. We hit this twice in real sessions. It's a real problem, not an edge case.
The state saving inconsistency we mentioned earlier is the most annoying issue we encountered. Losing a dialled-in patch because the LFO rate reset on session reload is the kind of bug that erodes trust quickly. It didn't happen every time. But it happened enough that we changed our workflow to work around it. A plugin that changes your workflow for the worse is a plugin with a real problem.
The lack of visible parameter values on several controls makes precise recall and patch documentation harder than it should be. If you're building sounds for a client session, you want to be able to write down "LFO rate: 0.3Hz" in your session notes. With Aura, you can't always do that.
Overdriving the input can produce clipping that doesn't sound musical. A clip indicator or soft saturation at the input stage would help. Instead, you occasionally get a harsh digital clip if you load a loud source without gain-staging first. Gain stage your source audio before loading it. Keep peaks at around -6dBFS or lower.
Who This Is Really For
We've been specific throughout this review, but here's the direct version:
- ✅ Buy if you make lo-fi hip-hop, trap, or cinematic music and want a fast granular texture tool that doesn't demand technical knowledge to use well.
- ✅ Buy if you want a single plugin that handles granular processing, modulation, reverb, and compression in one place without complex signal routing.
- ✅ Buy if you're on VST3 or AU hosts and work primarily with atmospheric, pad-like textures.
- ❌ Skip if you work in Pro Tools. There's no AAX version and there's no workaround.
- ❌ Skip if you need precise grain parameter control or complex modulation routing for serious sound design work.
- ❌ Skip if your sessions require consistent, reproducible patch recall with no state-saving variability.
Specs & Technical Details
| Developer | Thenatan Audio |
|---|---|
| Price | $79.50 |
| Plugin Format | VST3 / AU (no AAX) |
| OS Support | Mac / Windows |
| Activation | Licence key, no iLok required |
| CPU Usage | Medium (4 instances stable; 6+ may cause dropout at 256-sample buffer) |
| Trial Available | N/A |
| Version Reviewed | N/A (current release as of 2026) |
Score Breakdown
| Category | Score | Notes |
|---|---|---|
| Sound Quality | 4.0/5 | Warm, smooth granular output suits lo-fi and cinematic work; limited texture range for advanced sound design |
| Value for Money | 4.0/5 | Competitive price for a plugin with onboard effects and a genuinely usable grain engine |
| Ease of Use | 4.5/5 | Drag-and-drop workflow and minimal interface are genuinely fast for producers |
| Features | 3.0/5 | LFOs, reverb, compressor, tremolo, and panner cover the basics but lack depth for advanced users |
| CPU Efficiency | 3.5/5 | Medium usage; 4 instances comfortable, more requires careful buffer management |
| Overall | 3.5/5 | A fast, focused granular FX tool for producers who know what it is and aren't expecting what it isn't |
Alternatives to Consider
If Aura's limitations are dealbreakers, here are three real alternatives worth your time.
Output Portal is the closest competitor in the "granular FX for producers" space. It has a better preset browser, more polished UI, and a strong factory library. It's designed for the same producer audience and runs on all major VST3/AU hosts. If you want more polish and are willing to pay more, Portal is the move. Check our granular FX plugins guide for a side-by-side context.
Sound Guru Emergence targets a similar atmospheric use case but goes deeper on modulation architecture. If you want Aura's sonic character with more control over how that character moves and evolves, Emergence is worth investigating. It's more complex to dial in, but the ceiling is higher.
iZotope Iris 2 is for producers who've outgrown the abstracted approach and want real grain-level control. It's a spectral-sampling granular synthesiser with a steep learning curve and a deep feature set. If you find yourself hitting Aura's ceiling repeatedly and wanting more, Iris 2 is the natural next step.
The Verdict
Aura does one thing well: it gets you to a textured, atmospheric granular sound faster than almost anything else at this price point.
That's a real value proposition in a production environment where time is the actual currency. If you're making beats, scoring to picture, or building a lo-fi library, and you've been putting off granular because it always seemed complicated, Aura is the plugin that will finally make you use it.
But it's not a deep tool. It doesn't pretend to be, and that honesty is part of what makes it work. The abstracted controls, the limited parameter visibility, and the onboard effects are all designed for one type of user. That user will love Aura. Anyone outside that profile will feel the ceiling quickly.
The state-saving inconsistency is a real problem we'd want fixed. The no-AAX situation is a firm barrier. The non-interactive waveform display is a frustration that a software update could solve.
At $79.50, Aura is worth buying if you know who you are as a producer and your answer matches the use cases we've described. It's worth skipping if you're hoping it's something more than it is. Buy it for speed. Don't buy it for depth. That's the honest version, and it's the one a friend would give you.
Related reviews: Motion Fractal Crossgrade Review 2026 · Lese Slice Review
Frequently Asked Questions
Does Aura by Thenatan Audio work with Pro Tools?
No. Aura is available in VST3 and AU formats only. There is no AAX version, which means Pro Tools users cannot run it in their DAW. This is a firm limitation with no workaround inside Pro Tools itself. If your workflow is built around Pro Tools, this plugin isn't for you.
What kind of audio works best as a source in Aura?
Melodic source material with long sustains produces the best granular textures: pads, strings, sustained synths, and tonal vocals. Percussive loops can be used but will lose most of their rhythmic character in the process. Full mix stems produce wide, dense textures that are more unpredictable but can be beautiful when they work.
Is Aura suitable for sound design, or is it more of a producer tool?
It's a producer tool. The abstracted controls and fast workflow suit beat-makers and composers who want atmospheric textures quickly. Sound designers who need precise parameter control, repeatable patch recall, and complex modulation routing will hit Aura's ceiling fast and should look at something like iZotope Iris 2 or Arturia Pigments instead.
Does Aura run natively on Apple Silicon Macs?
Based on our testing on an M2 MacBook Pro running Logic Pro 11, Aura ran without requiring Rosetta emulation. This is good news for Apple Silicon users. That said, compatibility can vary across specific hardware and OS versions, so we'd recommend checking Thenatan's current compatibility notes before purchasing if you're on a newer Apple Silicon machine.
How many instances of Aura can you run before CPU becomes a problem?
In our testing, four simultaneous instances ran without issues at a standard buffer setting. Six instances began to cause dropout warnings at 256-sample buffer. CPU usage is moderate rather than light. If you're running a complex session with many plugins, we'd recommend treating Aura as a medium-CPU-cost plugin and planning your instance count accordingly.
Can you save and recall presets in Aura?
Aura doesn't have an internal preset browser. Preset saving and loading happens through your DAW's standard plugin state mechanism. We also encountered occasional issues where certain parameters, particularly LFO rate, reset on session reload. Until this is addressed in a software update, we'd recommend explicitly saving plugin states and noting key settings manually when building sounds you want to reproduce.
Is Aura good for lo-fi hip-hop production specifically?
Yes, and it's probably the genre where Aura earns its price most clearly. The grain engine's warm, diffuse character, combined with tempo-synced LFO modulation and the onboard reverb, makes it a natural fit for lo-fi hip-hop textures. Drop in a vinyl sample or a dusty piano loop and you can have a working atmosphere in under five minutes. It's one of the genuinely underrated quick tools for the genre.