A mixing techniques guide covers the six core processes every mix needs: EQ, compression, panning, reverb/delay, automation, and gain staging. Master these in order, on organised tracks, with a reference track loaded, and your mixes will translate across speakers.
Good mixing is not magic. It's a repeatable sequence of decisions, applied in roughly the same order, every session. The reason 75% of songs fall apart isn't weak songwriting. It's a mix where the low-mids are swamping the vocal, the kick has no definition, and everything is fighting for the same 200-500Hz pocket.
We've mixed records across genres and rebuilt sessions that looked unfixable. The same problems show up every time. And the same solutions work every time.
This guide walks you through every technique that matters. EQ first. Then compression. Then space, width, and movement. We'll cover parallel compression, the Abbey Road reverb trick, automation strategy, and where AI tools genuinely fit into the chain. We'll also flag the stuff most guides skip: genre-specific thinking, mix troubleshooting when reference tracks aren't enough, and the basics of spatial mixing for Dolby Atmos.
Start here. Link back here when you need to check your process.
What Should You Do Before You Touch a Single Plugin?
Organise your session. This is the step everyone skips and then pays for at hour three.
Group every drum mic onto a drum bus. Route your guitars to a guitar bus. Vocals to a vocal bus. Now you can control the relative level of entire instrument groups with one fader, and you can print parallel compression on the bus rather than plugin-by-plugin on individual tracks.
Gain stage next. Every track should hit its channel strip at around -18 dBFS RMS. That gives you headroom before the bus and before the master. If your kick is slamming at -6 dBFS before a single compressor, you've already lost the mix.
Load a reference track. Not to copy it. To give your ears a calibration point. We use at the start of every session. Drag the reference into your DAW, level-match it to your mix output, and A/B throughout.
Take breaks. Five minutes after every 20-30 minutes of work. Ear fatigue is real, and it's annoying because it costs you nothing except the discipline to stop.
How Do You Actually Use EQ in a Mix?
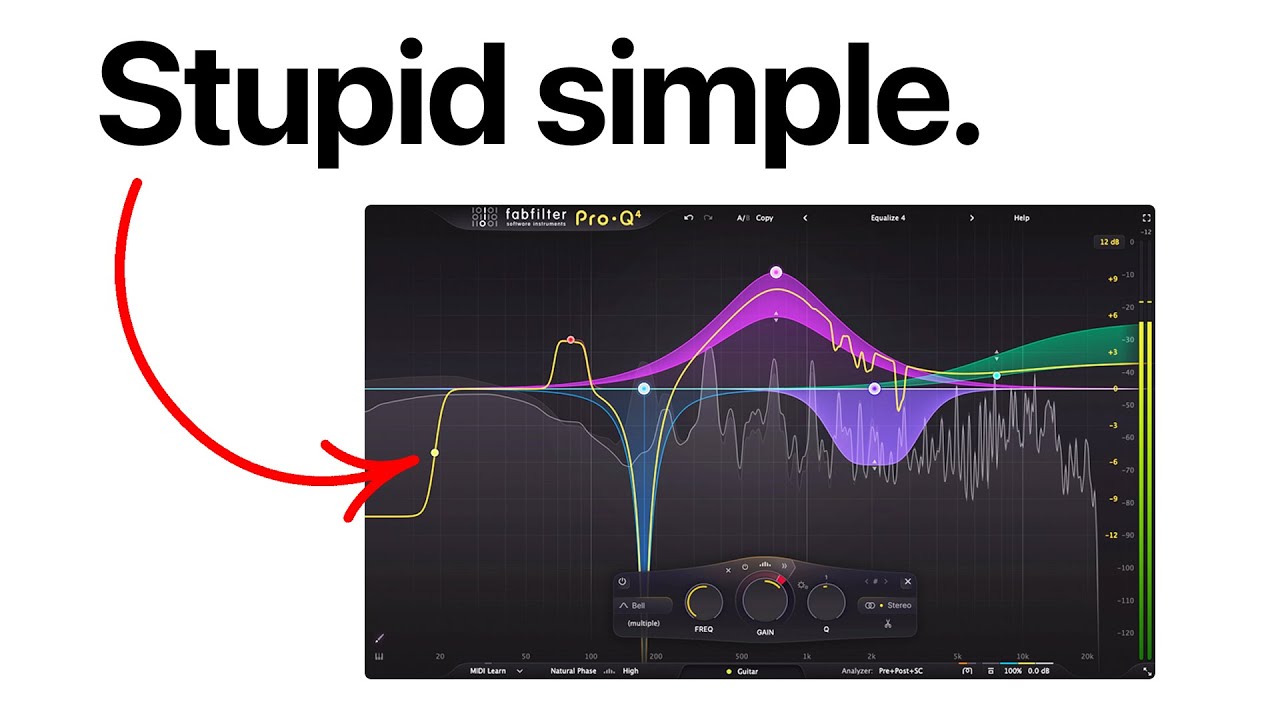
EQ is subtractive first. You cut problems before you boost character.
High-pass every track that doesn't need low-end. Acoustic guitar: cut below 120Hz. Lead vocal: cut below 80Hz. Even a slight buildup of sub-energy across 20 tracks will turn your low-end into mud before your kick has a chance.
Find the frequency that's making an instrument ugly and cut it. On a snare, that's often a boxy ring somewhere between 400-600Hz. Narrow the Q to around 1.5-2.0, sweep until you find the offender, and pull it down 3-4 dB. The snare doesn't disappear. It actually sounds more present.
We ran a vocal through FabFilter Pro-Q 3's dynamic EQ on a recent session. There was a harsh 3.2kHz spike that only appeared when the singer pushed for high notes. A static cut would have dulled the vocal across the whole performance. A dynamic band, set to trigger above a threshold, caught only the harsh moments and left the rest alone. The difference was immediately satisfying.
Boost with a wide Q (0.5-0.7) to add air or weight. Cut with a narrow Q (1.2-2.0) to remove problems. That's the whole framework.
Where Do Instruments Live in the Frequency Spectrum?
Sub-bass sits 20-80Hz. Kick and bass fundamentals live 80-200Hz. Low-mid mud lives 200-500Hz. Presence and definition: 1-5kHz. Air and shimmer: 8-16kHz.
Carve space for each instrument by cutting where it overlaps with the next. If your bass guitar is thick at 250Hz and your kick needs punch at 250Hz, cut the bass there and boost the kick. They can't share the same room.
What Does Compression Actually Do, and How Do You Dial It In?
Compression controls dynamic range. It turns down loud moments so you can turn up the whole track. That's it.
Start with attack and release, not ratio. A fast attack (1-5ms) catches transients immediately. A slow attack (20-50ms) lets the transient punch through before the compressor grabs the body. For a snare that lacks crack, slow the attack down to 25ms and let the initial hit escape the compressor. You'll hear the difference in two seconds.
Release sets how quickly the compressor lets go. Too fast and you get pumping. Too slow and the compressor never recovers between hits. Match the release to the tempo: roughly 800ms divided by BPM is a starting point for rhythmic material.
What Is Parallel Compression and When Do You Need It?
Parallel compression, also called New York compression, keeps your transients alive while adding density. You send the signal to a second compressor channel, crush it hard (10:1 ratio, fast attack, heavy gain reduction), then blend it back under the dry signal at around 20-40% wet.
On a drum bus, this is the technique. We ran a drum bus through Soundtoys Devil-Loc Deluxe at roughly 5% wet mix. The kick and snare kept their snap. The overall kit gained glue and weight without sounding squashed. That 5% number is a real starting point, not a rule.
Parallel compression works on bass, vocals, and even full mixes. The key is keeping the dry signal dominant. The crushed signal fills in below it.
How Do You Use Reverb and Delay Without Washing Out Your Mix?
Space is where mixes lose clarity. Too much reverb and everything sounds like it was recorded in a different room from where it was supposed to be.
The Abbey Road reverb trick solves this directly. Run your reverb on a send, not an insert. High-pass the reverb return at 600Hz and low-pass it at 6kHz. Now the reverb only occupies the mid-frequency range. The low-end of the reverb (which clouds the mix) is gone. The high-frequency shimmer (which competes with cymbals and air) is gone. What's left sits behind the dry signal without competing with it.
We tried this on a vocal reverb using Valhalla Room with the send EQ'd hard at both ends. The vocal tail spread naturally behind the dry signal. It stopped fighting the guitar that was sitting in the same space. Brilliant fix for a problem we'd been overcomplicating.
Delay on vocals works best when you sync it to the tempo. A dotted-eighth note delay (1.5 x one 16th note) fills rhythmic gaps without doubling the vocal. Keep it 6-10 dB below the dry signal.
How Does Panning Create Width?
Most of your low-frequency content should stay centre. Kick, bass, lead vocal: all centred. Panning low-frequency elements wide creates an unstable stereo image that falls apart on mono playback.
Guitars, synth pads, and rhythm elements can pan 30-70% either side. Doubles pan opposite. Room mics pan wide. Overheads pan to taste, but don't go 100% left and right on overheads unless you want an exaggerated cymbal spread.
Use a mono check regularly. If your mix loses definition when summed to mono, something is out of phase or panned in a way that creates cancellation.
What Is Automation and How Much Should You Use?
Automation is the difference between a static mix and a living one. It's recording fader moves, pans, mutes, or effect parameters into the timeline so the mix breathes with the song.
Vocal rides are non-negotiable. Even a well-performed vocal will have syllables that poke out and phrases that disappear. Write volume automation on the vocal fader, not a compressor. Use the compressor for dynamics control and automation for performance levelling. They're not the same thing.
We once had a chorus vocal that was clashing with the lead guitar every time they hit at the same time. Instead of pulling down the guitar track globally, we wrote a 2 dB guitar dip only during vocal phrases. The guitar stayed full in the instrumental sections. The vocal cut through in the chorus. One automation move fixed a problem that six EQ adjustments hadn't solved.
Automate reverb sends during transitions. Pull the reverb send down in dense verses and open it up in the pre-chorus. The mix opens physically as the arrangement does.
Where Do AI Tools and Spatial Mixing Fit In?
AI mixing tools are not shortcuts. They're starting points, and they're useful ones if you know how to override them.
iZotope Ozone 11 (check the manufacturer's site for current pricing) added a Clarity module in the 2026 update that targets masking between low-mids and vocals. It's not perfect, but it identifies the frequency conflict faster than sweeping manually. We use it to find the problem and then fix it ourselves with Pro-Q 3. The AI flags it. We decide what to do.
For spatial mixing, Dolby Atmos is object-based rather than channel-based. Instead of placing audio left or right, you place objects in 3D space and let the renderer handle the translation to whatever speaker system is playing back. In a mix context, this means your reverb tails can exist above the listener while the dry vocal stays centred at ear level. Logic Pro's Atmos tools and Pro Tools Ultimate both handle this, but covers the practical workflow.
Real-time collaboration tools like Splice Studio and Audiomovers LISTENTO let you share session audio and stems with other engineers remotely. Stem separation tools like Moises and RipX let you isolate elements from finished tracks for remix work or reference analysis. These aren't gimmicks. They've changed how co-production sessions actually run.
Worth Bookmarking
- iZotope, Ozone, Neutron, and RX for mixing and repair
- FabFilter, Pro-Q 3, Pro-C 2, and Pro-MB are studio staples
- Valhalla DSP, Room, Vintage Verb, and Supermassive (free)
- Soundtoys, Devil-Loc, EchoBoy, and the full bundle
- Splice, Sample library and real-time session collaboration
- Audiomovers LISTENTO, Low-latency remote monitoring and session sharing
- Moises, AI stem separation for reference analysis and remix prep
Summary
Mixing is a sequence, not a scramble. Organise your session and gain-stage before a single plugin opens. EQ subtracts problems first, then adds character. Compression controls dynamics. Parallel compression adds density without killing transients. Reverb and delay create depth with the high-pass/low-pass trick keeping things clear. Panning builds width. Automation makes it breathe. AI tools help you find problems faster. Spatial mixing is here now, not later.
Do these things in roughly this order, with a reference track loaded and breaks taken, and your mixes will stop fighting you.
Part of our complete Beginner's Guide to Mixing: 7 Steps That Actually Work series.
Frequently Asked Questions
What order should I mix in?
Start with gain staging and session organisation, then work from the bottom up: kick and bass first, then drums, then low-mid instruments like guitars and keys, then vocals last. Getting the low-end relationship right before touching anything else saves you from re-EQing everything twice. Vocals last because they sit on top of whatever you've built underneath.
How loud should my mix be before mastering?
Aim for your mix output to peak around -6 dBFS true peak, with an integrated loudness of roughly -14 to -18 LUFS. This gives the mastering engineer headroom to work. If your mix is already hitting -3 dBFS and clipping the master bus, there's nothing left to add.
What is the Abbey Road reverb trick?
It's a technique where you high-pass the reverb return at 600Hz and low-pass it at 6kHz, so the reverb only occupies the mid-frequency range. This removes the low-end mud and high-frequency smear that reverb normally adds to a mix. Use it on a send, not an insert, so the dry signal stays unaffected.
When should I use EQ before compression vs. after?
EQ before compression shapes the tone that the compressor responds to. If you boost 3kHz before a compressor, the compressor will react more aggressively to 3kHz content. EQ after compression shapes the final tone without affecting the compressor's behaviour. Most engineers use both: pre-EQ to fix problems, post-EQ to shape character.
How do I stop my mix from sounding muddy?
High-pass every track that doesn't need sub-bass. Then find the specific frequency in the 200-500Hz range that's building up and cut it on the worst offenders. Check your mix in mono and listen for where the low-mids become indistinct. Cutting 2-4 dB at 300Hz with a Q of 1.2 on guitars, keyboards, and room mics often clears the mud immediately.
Do I need parallel compression on every mix?
Not every mix, but most drum mixes benefit from it. Parallel compression is frustrating to set up once and then satisfying every time after that, because you realise how much density it adds without killing the transients you worked to preserve. If your drums sound flat but you don't want them squashed, parallel compression is the fix.
What's the difference between a send and an insert for reverb?
An insert puts the reverb directly in the track's signal chain, so 100% of the signal passes through the reverb plugin. A send routes a portion of the signal to a reverb bus, keeping the dry signal completely intact on the original track. Sends are almost always the right choice: they use less CPU, let multiple tracks share one reverb, and let you EQ the reverb return separately.
Should I be mixing for Dolby Atmos?
If you're delivering to streaming platforms, yes, it's worth learning. Atmos streams are available on Apple Music and Amazon Music HD, and the format is growing. That said, don't mix Atmos until your stereo mix is solid. The object-based workflow in Logic Pro or Pro Tools Ultimate is approachable, but the fundamentals are the same: good gain staging, clean EQ, and controlled dynamics work in every format.