
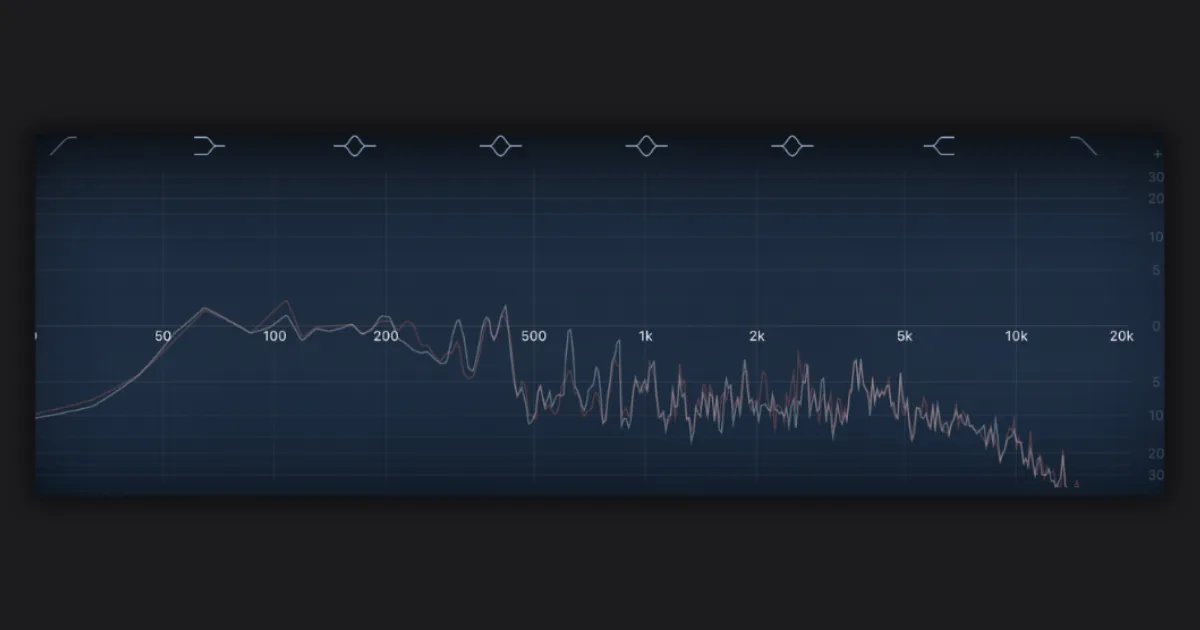
Mastering EQ shapes the final tonal balance of your mix using surgical, small-increment adjustments, typically 0.25 to 1.5 dB, applied after all creative mixing is done. The goal is translation: your master should sound consistent across speakers, headphones, streaming platforms, and club systems.
Mastering EQ is the last tonal decision that stands between your mix and every listener. Get it right and your track breathes. Get it wrong and you've baked a problem into every format it'll ever play on.
This isn't a "fix it in mastering" guide. We're assuming your mix is solid. What we're covering here is how to use EQ at the mastering stage to maximise translation, control problem frequencies, and make informed decisions your mixing ears were too close to catch.
We've run these techniques across hundreds of masters spanning electronic, rock, hip-hop, and orchestral work. The principles hold regardless of genre. The specific frequency targets shift. We'll cover both.
One thing most EQ guides skip entirely: your monitoring environment directly determines every EQ decision you make. We'll deal with that first, because every frequency move you make is only as trustworthy as the room you're making it in.
Why Does Your Monitoring Environment Change Everything?
Your speakers lie. Every pair does, to some degree. A boost you hear at 200 Hz might be your room's standing wave, not your master. You chase it, cut it, and the master sounds thin everywhere else.
Flat-response monitors like the Genelec 8040 or Yamaha HS8 get you close. But "close" isn't close enough for mastering decisions at 0.25 dB resolution.
Room correction software closes the gap. Sonarworks SoundID Reference measures your room's frequency response with a calibration mic and applies a correction curve in real time. We've used it on untreated home studios and the before/after on the low-mids is sometimes alarming.
The workflow: calibrate your room first. Then load a reference track you know sounds great on your target playback system. Only then reach for EQ.
Skip this step and you're EQing a room, not a master.
What Are the Core Mastering EQ Principles?
Small moves, repeated decisions
The standard working increment is 0.25 dB. A 1.5 dB boost at 10 kHz sounds dramatic at the mastering stage because it's affecting the entire sum of your mix. We rarely exceed 2 dB in a single band. Never more than 3 dB except in genuine problem-solving situations.
If a single band needs more than 3 dB, the problem is in the mix. Send it back.
Cut first, boost second
We love this rule. Find what's hurting the track before you reach for the polish. A 1 dB cut at 280 Hz with a Q of 1.2 often does more for perceived clarity than a 2 dB air boost at 12 kHz. Cuts subtract masking. Boosts add energy. Both have their place, but the cut usually comes first.
Use your ears in bypass
A/B against the unprocessed signal obsessively. Loudness bias is real: the louder version always sounds better, even if it sounds worse. Match gain before comparing. iZotope's Tonal Balance Control helps here because it gives you visual confirmation your changes are moving in the right direction relative to genre targets.
Which Frequencies Matter Most in Mastering?
The sub and low end: 20 Hz to 120 Hz
Start with a high-pass filter. Roll off everything below 30 to 40 Hz at a gentle slope. We use 6 dB/octave or less. Steeper than that and you risk dulling the weight of a kick or bass at 50 Hz.
The sweet spot for low-end EQ decisions is around 80 Hz. A small boost here, 0.5 to 1 dB with a wide Q around 0.7, adds weight without muddiness. A cut here cleans up a mix that feels heavy on laptop speakers.
The low-mids between 150 Hz and 300 Hz are where most masters accumulate mud. A narrow cut at 220 Hz, Q of 1.4, often makes the whole mix feel more open. We've heard this described as "removing the blanket." That's accurate.
The critical midrange: 300 Hz to 3 kHz
This is the danger zone. Heavy-handed EQ here affects every instrument simultaneously: vocals, guitars, kick presence, synth body, piano. Work in 0.25 dB increments. Seriously.
Around 2 kHz is where presence lives. A 0.5 dB boost here at a wide Q of 0.6 can push a vocal forward across the whole mix. The frustrating thing: too much and it sounds harsh within seconds on earbuds.
Air and presence: 5 kHz to 20 kHz
Gentle high-shelf boosts starting at 8 to 10 kHz add air and perceived high-end detail. SSL and API-style hardware emulations like the Waves API 550A add a satisfying harmonic character alongside the EQ curve. Purely linear EQ plugins don't do that.
5 kHz is where sibilance and harshness concentrate. Cut narrowly here if the mix feels aggressive on headphones but fine on speakers.
Linear Phase or Minimum Phase: Does It Actually Matter?
Yes. And the answer changes depending on what you're doing.
Linear phase EQ applies zero phase shift. Every frequency arrives at the output at the same time. This is why it's the theoretical ideal for mastering: no smearing of transients, no phase relationships altered between instruments that were mixed together. Plugins like the FabFilter Pro-Q 3 in linear phase mode and iZotope Ozone's EQ module both do this well.
The catch: linear phase EQ introduces pre-ringing at high-boost amounts on sharp Q settings. We've had a master where a 2 dB boost at 60 Hz with a tight Q using linear phase added a low-frequency pre-ring that was barely audible in isolation but caused pumping on the limiter.
Minimum phase EQ, the kind you find in analog hardware and hardware emulations, shifts phase but sounds more "natural" because it behaves like real circuits. Use it for light tonal shaping. Use linear phase when preserving transient integrity is critical, like on acoustic music or anything with a sharp kick transient you're working around.
We typically run minimum phase for broad tonal adjustments early in the chain and switch to linear phase for any corrective surgery.
What Is Mid/Side EQ and When Should You Use It?
Mid/Side processing is the most powerful mastering technique most producers never touch. Here's what it does.
Your stereo signal contains two components: the mid channel (everything panned centre) and the side channel (everything panned left or right, the "width" information). M/S EQ lets you process them independently.
This opens up decisions impossible in standard stereo EQ. Cut low-end build-up from room reverb tails in the sides without touching the kick. Boost 10 kHz on the sides only to add width and air without affecting the centred vocal. Tighten a muddy stereo synth pad by cutting 200 Hz in the sides while leaving the mono low-end intact.
A real M/S moment
We were mastering an indie rock track. The stereo guitars were too wide and too boomy in the low-mids. The side channel had a 3 dB build-up at 180 Hz that was inaudible in mono playback but made the mix feel bloated on any speakers wider than 6 inches. A narrow cut: 1.2 dB at 180 Hz, Q of 1.0, sides only. The mix immediately felt tighter. The guitars didn't shrink. The low-end bloat disappeared.
FabFilter Pro-Q 3 makes M/S EQ genuinely accessible. You select mid or side mode per band. iZotope Ozone has a dedicated M/S module. If you're serious about mastering, M/S EQ is not optional.
How Should You Structure a Mastering EQ Chain?
Chain order matters. Here's how we build it.
First in the chain: a high-pass filter and any corrective cuts. You want to remove problems before any compression or saturation sees the signal. Feeding a compressor a mix with a 300 Hz bump means the compressor will react to that bump on every transient.
Second: any broad tonal shaping. Wide-Q shelves and gentle boosts that define the character of the master.
Third: dynamic EQ or multiband compression if the mix has frequency-specific dynamic problems. This is where the conversation about mastering EQ gets interesting, because standard guides stop at static EQ.
Dynamic EQ: the underused tool
Dynamic mastering EQ reacts to the incoming signal. It only cuts or boosts when a frequency threshold is crossed. This is different from de-essing: we're talking about controlling a mix's low-mid build-up that only happens when the bass and kick hit simultaneously, or a 3 kHz harshness that appears only during the bridge.
We ran a master with a consistently annoying 2.5 kHz peak that appeared specifically when the snare, distorted guitar, and lead vocal all hit at once. A static cut at 2.5 kHz fixed the peak but dulled the whole track in quieter sections. A dynamic EQ node set to trigger at -18 dBFS, 1.5 dB reduction, Q of 1.8 solved it cleanly. The track breathed normally. The peak was controlled.
Weiss DS1-MK3 emulations and FabFilter Pro-Q 3's dynamic mode both handle this. iZotope Ozone's Dynamic EQ module has the most approachable interface.
After EQ: compression, then saturation if used, then limiting last. EQ can also appear post-compression for very minor output-stage shaping, but keep those moves under 0.5 dB.
Genre-Specific EQ Targets
Genre targets are starting points, not rules. But they prevent you from applying a flat-reference framework to music that was never meant to measure flat.
Electronic/EDM: Sub-bass content often extends to 35 Hz intentionally. High-pass at 25 Hz or lower. Expect boost decisions at 60 to 80 Hz. The 3 to 5 kHz range often needs a subtle 0.5 dB cut to prevent harshness on streaming masters.
Hip-hop/Trap: 808s live at 50 to 80 Hz. Low-mids at 150 to 200 Hz often accumulate from layered samples. A 1 dB cut at 170 Hz with a Q of 0.8 is a common starting point. Vocal presence at 2 to 3 kHz needs room.
Rock/Metal: Guitar mids between 400 and 800 Hz can congest mastering headroom fast. Cut before you boost. The 5 kHz harshness issue is constant on heavy material. High-pass can go as high as 50 Hz without hurting bass guitar weight.
Acoustic/Classical/Jazz: Linear phase EQ is most important here. Transient integrity matters more than any other genre. Work in 0.1 dB increments if necessary. Room tone at 300 to 500 Hz can feel warm or boxy depending on whether it flatters the recording. Your call.
Worth Bookmarking
- Sonarworks SoundID Reference, Room and headphone calibration. Non-negotiable for trustworthy EQ decisions.
- iZotope Tonal Balance Control, Visual reference for genre-appropriate frequency balance.
- FabFilter Pro-Q 3, Our most-used mastering EQ. Linear phase, M/S, dynamic modes in one plugin.
- Waves Linear Phase EQ, Budget-friendly linear phase option.
- iZotope Ozone, Full mastering suite with mastering-grade EQ built in.
- brainworx bx_digital V3, Dedicated M/S mastering EQ with per-band mono maker.
- Reference 2 by Mastering The Mix, Reference track comparison tool that integrates directly into your DAW.
- Sound On Sound Mastering Essentials, Deep editorial archive on mastering workflow and technique.
- Mastering The Mix Blog, Practical, technical mastering tutorials with real examples.
Summary
Mastering EQ works in small increments. 0.25 dB matters. The high-pass filter below 30 to 40 Hz is your first move, always. Standard frequency targets cluster around 80 Hz for low-end, 2 kHz for presence, and 8 to 10 kHz for air. M/S processing unlocks independent control of centre versus width. Dynamic EQ handles frequency problems that only appear under specific dynamic conditions. Your chain runs corrective cuts first, tonal shaping second, dynamic control third, limiter last. None of it works without a calibrated monitoring environment as your foundation.
Part of our complete Music Mastering Guide: Complete Beginner's Breakdown series.
Frequently Asked Questions
How much EQ is too much in mastering?
Any single-band adjustment over 3 dB is a signal that the problem belongs in the mix, not the master. We work in 0.25 to 0.5 dB increments for most tonal decisions, with corrective cuts occasionally reaching 1.5 to 2 dB. If you're regularly hitting 3 dB or more, send the mix back.
Should I EQ before or after compression in mastering?
Both. Corrective EQ and high-pass filtering go before compression so you're not feeding frequency problems into the compressor's detection circuit. Light output-stage EQ can go after compression to fine-tune the tonal result, but keep those moves under 0.5 dB. Limiting always goes last.
What's the best EQ plugin for mastering?
FabFilter Pro-Q 3 is our first recommendation. It handles linear phase, minimum phase, dynamic EQ, and M/S processing in one plugin with a genuinely useful visual display. iZotope Ozone is the better choice if you want a full mastering suite rather than individual plugins. Check our dedicated for full comparisons and current pricing.
What is M/S EQ and do I need it?
M/S EQ splits your stereo signal into the mid channel (centred audio) and side channel (stereo width information) and lets you apply different EQ settings to each. You need it for stereo width control, fixing boxy low-mids in reverb tails, and adding air specifically to the sides. It's not optional for professional mastering work.
What frequency should I high-pass filter in mastering?
Set your high-pass between 30 and 40 Hz using a gentle slope of 6 dB per octave or less. Steeper slopes risk pulling energy from bass content at 50 to 60 Hz. On electronic music where sub-bass is intentional, move the high-pass down to 20 to 25 Hz.
How do I fix a muddy mix at the mastering stage?
Start with a narrow cut between 150 and 300 Hz. Try 1 dB at 220 Hz with a Q of 1.4 as a starting point, then sweep slightly to find the worst accumulation point. If the mud is in the stereo width rather than the centre, apply the cut to the side channel only using M/S EQ. More than 2 dB of cutting in this range means the problem is in the mix.
What's the difference between linear phase and minimum phase EQ?
Linear phase EQ applies zero phase shift, meaning all frequencies arrive at the output simultaneously. It preserves transient integrity but can introduce pre-ringing at high boost amounts with tight Q settings. Minimum phase EQ behaves like analog hardware: it shifts phase but sounds natural and has no pre-ringing. Use linear phase for critical transient work and when pushing boosts over 1.5 dB.
Should I use dynamic EQ in mastering?
Yes, and it's underused. Dynamic EQ only acts when a frequency crosses a set threshold, which means it handles problems that only appear under specific mix conditions, like low-mid build-up when kick and bass hit simultaneously. It's cleaner than multiband compression for frequency-specific dynamic control and won't alter the tonal character of the master during quiet passages.
How do reference tracks help with mastering EQ decisions?
A reference track gives your ears an external anchor to prevent fatigue-based decisions. Load a commercially mastered track in a similar genre into a reference plugin like Reference 2 by Mastering The Mix. Match the loudness, then compare tonal balance. Specific differences in the 200 Hz to 2 kHz range will tell you more than any spectrum analyser.
Does mastering EQ matter for streaming platforms?
Yes. Spotify normalises to -14 LUFS, Apple Music to -16 LUFS. Heavy high-end boosts that sound great at high monitoring volume can become fatiguing at normalised streaming levels because the loudness compensation removes the masking effect. We check all masters at normalised volume before final bounce, and often trim the 8 to 10 kHz shelf by 0.25 to 0.5 dB specifically for streaming delivery.
What EQ settings should I use for hip-hop mastering?
Start with a high-pass at 25 Hz, a cut around 170 to 200 Hz (Q of 0.8) to control low-mid accumulation from layered samples, and check the 2 to 3 kHz range for vocal presence. 808 sub content typically lives at 50 to 80 Hz; be careful with any cuts there. Harshness in trap production often shows up between 4 and 6 kHz when the hi-hats and snare compete.
Why does my mastering EQ sound different on headphones than on speakers?
Headphones exaggerate stereo separation and often have a natural emphasis around 3 to 4 kHz and elevated sub-bass perception. Boosts that sound good on headphones often translate as harsh and boomy on speakers. Use multiple playback systems before finalising any mastering EQ decision, and calibrate both your headphones and speakers with Sonarworks SoundID Reference to get a neutral starting point across both.