
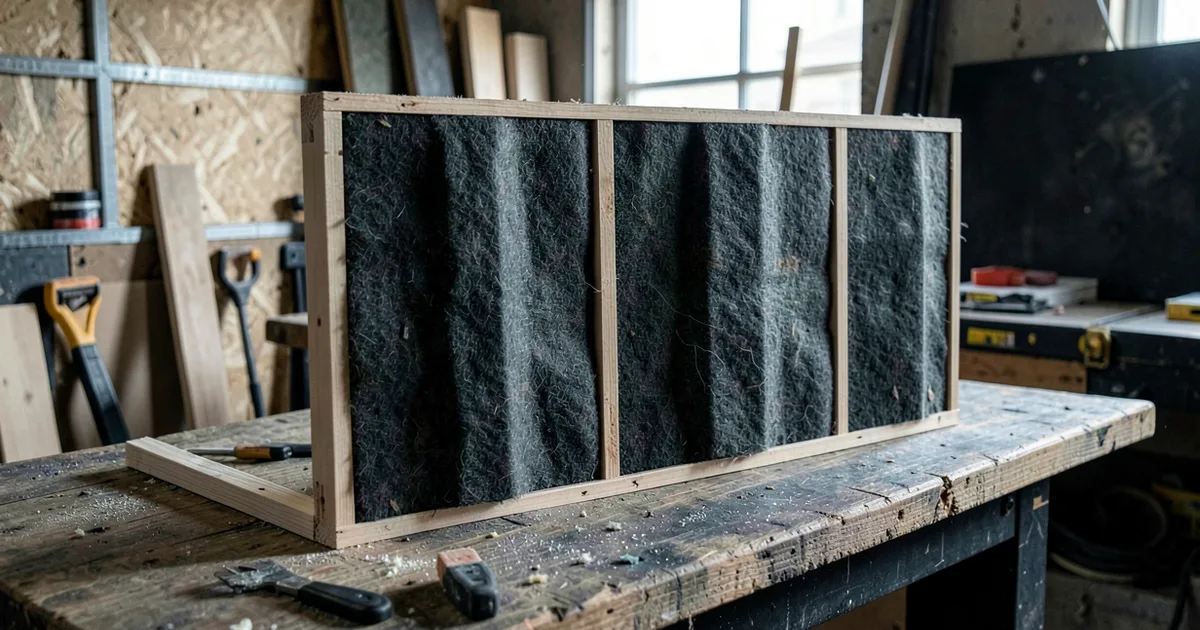
What You'll Need
- 2×4 lumber (or 1×4 for lighter frames)
- Rockwool Safe and Sound or Owens Corning 703 (2″ thick, 24″×48″ boards)
- Acoustically transparent fabric (burlap, guilford of maine, or similar)
- Miter saw or hand saw, drill, staple gun, measuring tape, L-brackets
- Wood screws (1-5/8″), staples (3/8″), picture-hanging hardware
- Skill level: Beginner. No joinery experience needed.
- Estimated time: 2–3 hours for your first panel, 45 minutes each after that
You can build DIY acoustic panels for under $30 each that outperform commercial foam products costing three times as much.
We’ve built these in apartments, project studios, and converted garages. The results are not subtle. A room treated with eight 2″ mineral wool panels drops its RT60 (reverb decay time) from 0.7–0.8 seconds down toward 0.4 seconds. That’s the difference between a bathroom and a studio. Commercial acoustic foam with an NRC of 0.40–0.60 can’t get you there. Mineral wool at 0.95 NRC can. Here’s exactly how to do it.
Step 1, Calculate How Much Coverage You Actually Need
Don’t build randomly. Treat 25–35% of your total wall surface area first.
Measure your room’s four walls. Multiply length by height for each. Add them together. Multiply by 0.30. That’s your target coverage in square feet for a solid starting treatment.
For a typical 10×12 room with 8-foot ceilings, that works out to roughly 53 square feet. Nine standard 2×4 panels (8 sq ft each) covers 72 square feet. That’s a well-treated room.
Use to run the numbers for your specific dimensions before you buy anything.
Step 2, Choose the Right Insulation Core (Don't Use Foam)
This is where most people waste money. Acoustic foam is frustrating. It looks like it works. It doesn’t, not at low frequencies.
Standard 2″ foam panels score NRC 0.40–0.60. They absorb high frequencies reasonably well but leave 250 Hz and below almost completely untouched. Your mix still sounds muddy. Your low-mids still bloom.
Rockwool Safe and Sound and Owens Corning 703 both score 0.95 NRC at 2″ thickness. That means 95% absorption across the 250 Hz–4 kHz range where mixing decisions live.
Rockwool Safe and Sound comes in 15-1/4″×47″ batts. OC 703 comes in 24″×48″ boards. A box of OC 703 runs approximately $87.50 with shipping for enough material to cut six 24″×48″ panels. Rockwool is typically $15 cheaper per equivalent coverage. Both work. We’d buy Rockwool first for the price.
Step 3, Cut Your Lumber to Size
Standard panel frame: two long sides at 47″, two short ends at 16-3/4″, all cut from 1×4 lumber (actual width: 3-1/2″). This creates a frame that holds a 15-1/4″×47″ Rockwool batt snugly with zero gaps.
For OC 703 panels, adjust your frame to 24″×48″ interior dimensions. Cut two pieces at 48″ and two at 21″ (accounting for the 1×4 width on each side).
A miter saw makes this fast. A hand saw and a steady hand works fine too. Cut all your lumber for a full batch of panels before assembling anything. Batch processing saves time.
We cut material for eight panels in one session. That’s 16 long pieces and 16 short pieces. Stack and label them. Assembly goes much faster.
Step 4, Assemble the Frames
Butt joint construction. No fancy joinery needed.
Drill two pilot holes at each corner to prevent splitting. Drive 1-5/8″ wood screws through the long side pieces into the ends. Use L-brackets on the inside corners for extra rigidity if you plan to hang these vertically.
Check square after assembly. Measure corner to corner diagonally. Both measurements should match within 1/8″. If they don’t, push the frame gently and re-check before the glue sets. Skipping this step is annoying to fix later.
Sand any rough edges. Your fabric will snag on splinters during the wrapping step, and you’ll wish you’d spent 90 seconds sanding.
Step 5, Insert the Insulation Core
Mineral wool is itchy. Wear long sleeves, gloves, and a dust mask. This isn’t optional.
Slide the insulation batt into the frame from the front. It should sit flush with or just slightly proud of the frame face. If you’re using OC 703 boards, score and snap them to size with a utility knife and a straight edge.
The insulation should fit snugly without compression. Compressed mineral wool loses absorption efficiency. If your batt keeps falling out, add a thin strip of wood across the back to hold it in place, or staple a layer of breathable fabric across the rear of the frame first.
We had one panel where we compressed the batt by about 15% to make it fit. The NRC drop was audible in tests. Don’t compress it.
Step 6, Choose and Test Your Fabric
Your fabric must be acoustically transparent. If it’s not, you’ve just built an expensive wall decoration.
The test: hold the fabric up to your mouth and blow. You should feel almost no resistance. If you can’t push air through it easily, sound can’t pass through it either. The fabric will reflect high frequencies back into the room instead of letting them reach the mineral wool.
Burlap works and costs roughly $4–6 per yard with store coupons. You need about 1.5 yards per 2×4 panel for clean wrapping. Guilford of Maine FR701 is the professional standard. It’s beautiful, it’s acoustically transparent, and it costs significantly more. Check the manufacturer’s site for current pricing.
For 14 panels on a budget, burlap from a fabric retailer runs around $50 total. It does the job.
Step 7, Wrap and Staple the Fabric
Lay your fabric face-down on a clean floor. Place the panel face-down on top of it, centered. Leave 3–4 inches of fabric on all sides for wrapping.
Start stapling at the center of one long side. Pull the fabric taut, staple every 3 inches. Move to the opposite long side, pull firmly, staple. Then do the short sides. Work from center outward on each side.
Corners: fold like wrapping a gift. Pull the point tight, fold the sides in, staple flat. Two staples per corner minimum.
The first corner you fold will look ugly. That’s normal. By the fourth panel you’ll fold clean corners without thinking about it. Satisfying when you nail it.
Step 8, Place Panels at First Reflection Points First
This is the most underrated step. Most people hang panels randomly. Don’t.
Sit at your mix position. Have someone hold a mirror flat against the side wall and slide it forward until you can see your speaker in the mirror. That spot is your first reflection point. Mark it. Repeat on the other side. These two positions get panels before anything else.
Then ceiling reflection (the spot directly between your speakers and your mix position). Then rear wall. Corners get bass traps, which are the same panels stood vertically in corners, ideally 4″ thick.
Use for a full placement diagram.
Step 9, Hang the Panels Safely
Two picture-hanging D-rings screwed into the back of the frame, positioned 1/3 down from the top on each side. Use appropriately rated hooks in the wall, ideally into studs.
A 2×4 panel with mineral wool weighs roughly 8–12 pounds depending on density. Standard picture hooks rated at 20 pounds work fine. Into drywall only, use proper drywall anchors rated for at least 15 pounds per hook.
Leave a 2–4 inch air gap between the panel and the wall where possible. This shifts the absorption curve lower in frequency, improving performance below 250 Hz. A panel at 2″ air gap absorbs meaningfully better at 125 Hz than the same panel mounted flush.
Step 10, Measure and Verify the Improvement
Don’t just trust your ears. Measure.
Room EQ Wizard (REW) is free and it’s the tool we use in every studio project. Download it from roomeqwizard.com. You’ll need a measurement microphone: the Behringer ECM8000 runs under $30 and is accurate enough for room measurement work. Connect it to your interface, set up REW, run a sweep.
Look at your RT60 measurement before and after treatment. You want to see the 500 Hz–2 kHz RT60 drop into the 0.3–0.5 second range for a home studio. If it’s still above 0.6 seconds, you need more panels or better placement.
REW also shows you frequency response anomalies. You’ll see exactly which room modes are causing the bass buildup at your mix position. Check for a walkthrough on interpreting the data.
Pro Tips
Air gap is free bass absorption. Mounting panels 2–4 inches off the wall costs nothing extra and improves low-mid absorption without adding mass. Use simple wooden standoffs or furniture bumpers.
Build in batches of four minimum. The setup time for cutting and stapling is the same whether you’re making one panel or four. Materials get cheaper per unit when you buy a full box of insulation.
Test the room with pink noise first. Play pink noise through your monitors before any treatment. Walk around the room. You’ll hear the comb filtering and flutter echo clearly. You’ll know exactly where to put your first panels.
Thick beats wide every time. One 4-inch thick panel does more broadband work than two 2-inch panels. If you have corner space, fill it with doubled-up panels and skip the bass trap conversation entirely.
Common Mistakes to Avoid
Buying acoustic foam instead of mineral wool. We’ve covered this. Foam’s NRC of 0.40–0.60 handles reflections above 1 kHz but ignores the frequency range where your mix decisions actually live. Mineral wool handles 250 Hz upward at 0.95 NRC. The price difference is small. The performance difference is not.
Covering too much high-frequency surface. A room with panels on every wall becomes dead. You’ll lose the natural room energy that makes listening comfortable. 30–40% coverage is a target, not a floor. Over-treated rooms make mixes that sound harsh on systems outside the studio.
Skipping the fabric transparency test. We stapled a beautiful canvas fabric onto three panels before realising it was essentially opaque to sound. Ripped all three apart. Do the blow test before you buy fabric, not after.
Ignoring the ceiling. The reflection from your ceiling between your speakers and mix position arrives at your ears almost simultaneously with the direct sound. It smears stereo imaging. A ceiling cloud is not optional if you’re mixing seriously.
Related guides: acoustic treatment guide · how to treat a bedroom studio
Frequently Asked Questions
How many DIY acoustic panels do I need for a home studio?
Cover 25–35% of your total wall surface area as a starting target. For a typical 10×12 room with 8-foot ceilings, that's roughly eight to ten 2×4 panels. Start with first reflection points and rear wall before worrying about total coverage numbers.
Is Rockwool or Owens Corning 703 better for DIY acoustic panels?
Both score 0.95 NRC at 2-inch thickness, so performance is nearly identical. Rockwool Safe and Sound is typically $15 cheaper per equivalent coverage area, which adds up across a full room build. We'd start with Rockwool unless you already have a supplier relationship for OC 703.
Can I use acoustic panels for bass trapping?
Standard 2-inch panels do absorb some bass, but not efficiently below 150 Hz. For real bass trapping, you need 4-inch thick mineral wool panels placed floor-to-ceiling in corners. The air gap trick (mounting panels 4 inches off the wall) helps shift absorption lower, but corner placement is what does the heavy lifting at the room modes that cause bass buildup.