
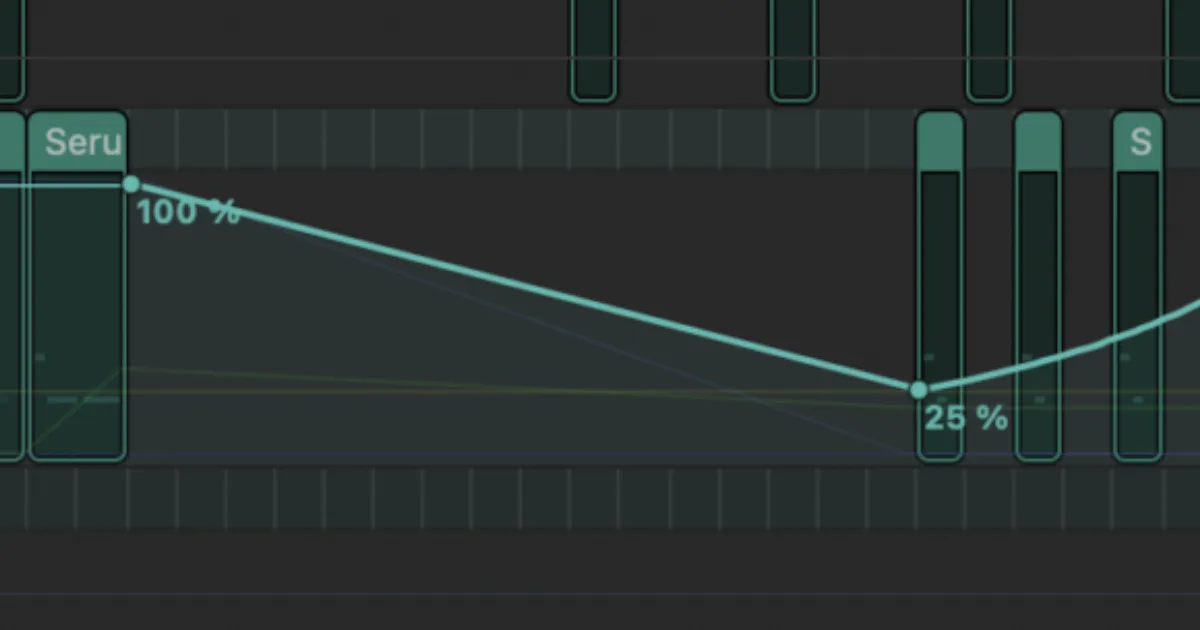
Mix automation is the process of recording or drawing parameter changes across a timeline so your DAW replays them on every playback. It's how professional engineers turn a technically correct mix into one that moves, breathes, and reacts to the song.
Automation is what separates a mix that's balanced from a mix that's alive. You can dial in perfect static levels, hit bypass on every plugin, and your track will still feel flat against a major-label release. The difference isn't gear. It's motion.
We've automated everything from lead vocal syllables to master bus gain to individual reverb send levels mid-chorus. This guide covers every technique we actually use, the modes you need to understand before you touch a fader, and the genre-specific strategies that are almost never written down.
Start here if you're new to automation. Come back when you're stuck on a specific technique. This is the hub for everything we publish on the subject.
What Is Mix Automation and When Should You Use It?
Automation is data. Your DAW stores a value for a parameter at a specific point in time, then reads it back during playback. That's it. Volume, pan, plugin parameters, send levels, mutes: all of it is just numbers written to a lane.
The right time to automate is after your static mix is 90% done. Not before. Automation before a solid foundation is like painting walls before the plaster is dry.
We made this mistake on a pop record years ago. We spent two hours automating vocal levels before the instrumental mix was settled. Every instrument balance change forced us to re-draw every vocal curve. Forty minutes of work gone. Now we lock the static mix first, then automate. Always.
The goal is to serve the song, not to demonstrate technique. A chorus that needs 2dB of bus lift to feel like a chorus isn't a mix problem. It's a normal arrangement dynamic that automation solves in thirty seconds.
What Parameters Are Worth Automating?
Volume and mutes first. Then pan. Then send levels. Plugin parameters last.
That priority order matters. Volume and mute automation gives you the biggest return for the least time. A vocal that drops 1.5dB on the low-energy verse lines and rises naturally on the pre-chorus doesn't need heavy compression. The automation does the work instead.
Send level automation is underrated. Automating the reverb send on a lead synth to pull back 4dB during dense sections keeps the low-mid from clouding without touching a single EQ knob.
What Are the Automation Modes and How Do They Work?
Every major DAW ships with four core modes. Understanding them stops you from accidentally destroying a good automation pass.
Read mode plays back whatever automation data exists on the track. Your fader moves but you can't change anything. This is your default playback mode.
Write mode records whatever you do from the moment playback starts. It overwrites everything below it. Dangerous if you forget you're in it. Brilliant for first passes.
Touch mode only writes when you're physically touching the control. Release the fader and it snaps back to the previous automation value. Works best with a control surface. With a mouse, "touching" means clicking and holding, which is workable but slightly annoying.
Latch mode is Touch but it doesn't snap back on release. The last value you wrote holds until playback stops. We use this for long slow fader rides where touch snapping would create visible discontinuities in the automation lane.
Pro Tools adds a Trim mode on top of these. It offsets existing automation relatively instead of overwriting it. If you've already written a detailed volume curve but the whole track needs to sit 1dB lower, Trim mode applies that shift without flattening your curve. Logic Pro X calls it a similar function but buries it inside the automation lane tools. Cubase handles it through the automation panel's offset mode.
Draw Mode vs. Real-Time Recording
Two ways to write automation. Real-time recording: you play the session, ride the fader, the DAW captures your moves. Graphical drawing: you zoom into the automation lane and place nodes by hand.
Real-time is faster and more musical for broad strokes. Fader rides on lead vocals, filter sweeps on synth pads, reverb send swells into a chorus.
Graphical drawing is more precise. Syllable-level vocal work, exactly reproducible parameter jumps, automation that needs to hit on the exact beat. We use both in every mix. The real-time pass gets us 80% of the way there. Graphical cleanup handles the rest.
How Do You Automate Vocals Professionally?
Pop vocal automation is the most time-consuming part of a professional mix. On a dense pop vocal, we automate every phrase. Sometimes every syllable.
Here's the process we use. After static gain staging and compression, we listen to the lead vocal lane solo'd. Every word that disappears into the track gets a +0.5dB to +1.5dB node. Every breath that clips through gets a -3dB to -6dB mute or volume dip. Every phrase ending that trails off gets a slight push, not a fade, to keep it present without extending the decay artificially.
We tracked vocals on an R&B record where the singer dropped 4dB dynamically between her chest and head register. No compressor ratio fixed it cleanly without squashing the life out of the head notes. Automation did. We drew a +3.2dB node at every register transition point. The vocal sat in the mix from verse to bridge without a single artifact. That's the satisfying part of this work: it's invisible and it works.
Automating Backing Vocals and Doubles
Back vocals need their own automation philosophy. They should support, not compete. We typically automate backing vocal busses down 1dB to 3dB during lead vocal phrases and bring them up on held notes where the lead isn't fighting for space.
Doubles are trickier. A vocal double that's perfectly volume-matched to the lead at every point sounds ugly. Too similar, too focused. We automate the double to come up on specific words for width, then drop it elsewhere. The listener doesn't notice the movement. They notice that the chorus sounds bigger.
What Are Advanced Automation Techniques Most Guides Skip?
This is where most automation tutorials stop asking interesting questions. Let's fix that.
Master Bus Volume Automation for Dynamic Range
A technique we use on every final mix: vary the master bus output level by 0.3dB across sections. Chorus gets 0dB. Verse sits at -0.3dB. Bridge comes up 0.1dB. The limiter ceiling never changes. The dynamic range between sections increases without touching a compressor ratio.
It's subtle. It's brilliant. It's the kind of move that makes A&R call back and say "this mix breathes."
Parallel Processing Automation
Parallel compression on a drum bus is standard. Automating the wet/dry blend of that parallel chain is not. During sparse sections, we push the wet blend on the drum parallel bus to 40-50%. The drums feel bigger without being louder. When the full mix comes in, we drop the parallel blend to 20-25%. The drums stop competing with the rest of the instrumentation for headroom.
Same principle applies to parallel saturation chains on bass. Automate the blend in on the chorus. The bass cuts through without a frequency-domain EQ fight.
Reverb and Delay Automation by Genre
Genre specifics matter here and they're rarely written down.
In hip-hop, we automate reverb pre-delay to change between sections. Verse vocal: 25ms pre-delay, tight. Hook: 40ms pre-delay, wider apparent space. Same reverb unit, same tail time. The room changes with the song.
In electronic music, automating a delay's feedback parameter before a drop is more effective than a filter sweep. Pull the feedback from 35% to 65% over four bars. The repeats pile up, tension builds, the drop hits clean. Ableton Live's automation lanes handle this in about ninety seconds of drawing.
In country and Americana, we automate tape slap delay throws on specific words. Not the whole phrase. Not even the whole word. The decay of a specific consonant. You draw a mute bypass node, duration 60ms, timed to open one sixteenth note after the lyric hits. It sounds like a natural room. It isn't.
AI-Assisted Automation Workflows
AI automation tools are coming into real studio use. iZotope's RX and Neutron can suggest gain curves based on spectral analysis. Izotope's Music Rebalance can isolate vocals for level adjustment that feeds directly into automation workflows. These aren't replacements for ear-based decisions. They're starting points.
We've used Neutron's track assistant output as a template for initial volume automation curves. It gets us 40% of the way there in two minutes. We spend the remaining time on the 60% it doesn't hear correctly. That's a better use of session time than starting from zero.
Splice's DAW tools and the emerging set of AI mix assistants are moving into this space aggressively. Worth watching. Not worth depending on yet.
Worth Bookmarking
- iZotope Learn, Free tutorials on mixing automation using Neutron and RX, including spectral-based gain riding techniques.
- Ableton Max for Live, Includes MIDI and automation tools for complex parameter modulation, especially useful for electronic production automation workflows.
- Sound On Sound Techniques, Deep engineering articles covering DAW-specific automation implementations across Pro Tools, Logic, and Cubase.
Do You Need a Control Surface for Automation?
No. You can mix a world-class record with a mouse. But a control surface changes the quality of your real-time automation passes in a way that's hard to describe until you've done both.
A motorised fader gives you physical resistance, tactile feedback, and the ability to ride multiple faders simultaneously. With a mouse, you're riding one parameter at a time. With an eight-fader surface, you can ride lead vocal and reverb send and drum overhead simultaneously in a single pass.
The Presonus FaderPort is the honest entry point. Eight motorised faders, solid DAW integration, check the manufacturer's site for current pricing. The Avid S1 is the Pro Tools-native option if you're working in that environment. The Softube Console 1 handles channel processing in hardware while you draw automation in the DAW. Three different philosophies. Which one fits depends on your workflow, not your budget aspiration.
If you're ITB on a laptop, a control surface is worth the desk space. If you're drawing automation graphically 90% of the time, it isn't.
What Are the Most Frustrating Automation Mistakes to Avoid?
Automating before the static mix is set. We covered this. It costs you hours.
Writing automation in Write mode and forgetting about it. You come back to the session, hit play, ride a fader to check something, and you've just overwritten forty-five minutes of work. Get into the habit of checking your mode before every playback.
Over-automating. We've received mixes from other engineers where every parameter on every track has automation data. Pan automation on room mics. Reverb time on a sub bass. It's noise. The listener hears none of it. The DAW burns CPU on all of it. Automate what changes the song. Leave everything else static.
Ignoring automation on the mix bus sends. If your vocal reverb bus isn't automated to duck slightly during dense mix sections, you're fighting low-mid buildup with EQ when automation is a faster, cleaner fix.
Summary
Automation is non-negotiable in professional mixing. Start with volume and mutes after your static mix is 90% complete. Understand your DAW's Read, Write, Touch, Latch, and Trim modes before you touch a fader. Use real-time recording for broad strokes and graphical drawing for precision work. Automate vocals at the syllable level, ride parallel compression blends across sections, and vary master bus level by 0.3dB between song sections to build dynamic range. A control surface helps but isn't required. Over-automation is as damaging as none at all. Serve the song, not the automation lane.
Part of our complete Beginner's Guide to Mixing: 7 Steps That Actually Work series.
Frequently Asked Questions
What is the difference between Touch and Latch automation modes?
Touch mode writes automation only while you're actively holding a fader or knob. Release it and the track snaps back to whatever automation value existed before your move. Latch mode holds the last written value after you release, instead of snapping back. Use Touch for short, precise edits. Use Latch for long fader rides where a snap-back would create a visible notch in the automation lane.
Should I automate before or after I mix?
After. Get your static mix to 90% first: gain staging, EQ, compression, spatial placement. Automation is a finishing tool, not a foundation. Automating early means every static mix change forces you to redraw automation curves, which wastes session time and makes the process frustrating rather than creative.
How do I automate vocals without it sounding robotic?
Use small gain moves. Most vocal automation sits between -2dB and +2dB per phrase. Anything larger is usually a sign that the static gain staging or compression isn't right. Draw curves with slight ramps in and out rather than hard nodes. And automate breaths separately from phrases so you have independent control over both without one adjustment affecting the other.
What parameters should I automate first?
Volume and mutes, always first. They give you the most impact for the least time. After that, send levels, especially reverb and delay sends that need to change between sections. Plugin parameters come last. They're the most time-consuming and often the least audibly significant, so don't start there if you're under a session deadline.
Can I automate third-party plugins in my DAW?
Yes, in every major DAW. Any VST3, AU, or AAX plugin parameter can be mapped to an automation lane. In Logic Pro X, right-click any plugin parameter and select "Create Track Automation." In Ableton Live, open the automation lane dropdown and scroll to the plugin within the channel. In Pro Tools, use the parameter list in the automation window. The workflow differs slightly per DAW but the capability is universal.
Is there a difference between automation and MIDI CC for controlling plugins?
Yes. DAW automation lanes record and play back parameter data as part of the session timeline, tied to audio playback. MIDI CC is a separate protocol, typically used for hardware or soft synth control, and lives inside MIDI clips. For mixing purposes, automation lanes are the right tool. MIDI CC is more relevant for performance and sound design work where you're shaping the instrument, not the mix.
How do I use automation to improve dynamics without heavy compression?
Ride the volume of individual tracks manually to even out dynamic range before compression does its job. A lead vocal that's already within a 3dB window from phrase to phrase needs far less compression ratio to sit consistently, which means more natural dynamics survive the chain. Combine that with master bus volume automation of 0.3dB between sections and you get perceived loudness variation between sections without touching a limiter threshold.