
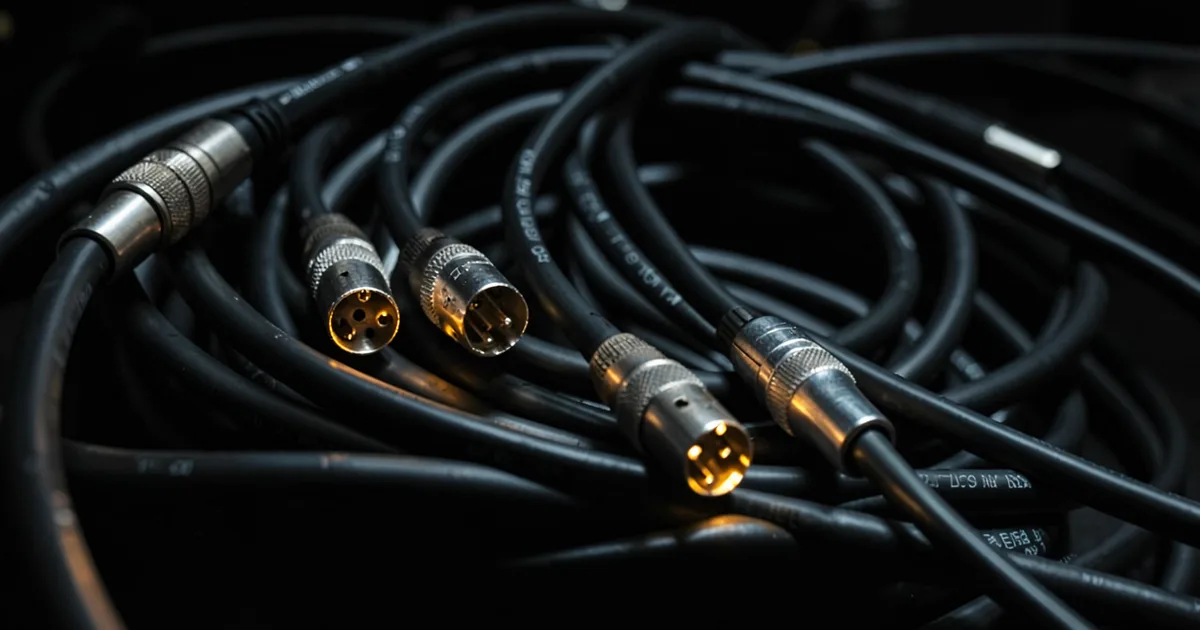
Studio cables carry your audio signal between gear, and the difference between a good one and a bad one comes down to shielding quality, connector build, and whether the cable is balanced or unbalanced. Get those three things right and you've got a cable that won't fail a session or inject noise into your mix.
The wrong cable will cost you more than the right one. Not because it breaks immediately, but because it degrades slowly: a hiss you blame on a preamp, a ground hum you spend an afternoon chasing, a loose XLR that drops signal mid-take. We've been through all of it. This guide is how we think about cables now.
We're covering every cable type you'll use in a modern studio, what the specs actually mean, and where to spend money versus where to save it. We're also filling in the gaps most cable guides skip: impedance matching for hybrid studios, shielding architecture in high-density racks, and USB/Thunderbolt specs that matter for digital signal runs.
This is the pillar resource for the cables and connectivity section of LordReverb. Every specific cable review and comparison links back here. Start here, then go deep on whatever applies to your setup.
What Are the Main Cable Connector Types?
There are four connector types you'll encounter in a working studio. Each serves a specific job. Mixing them up doesn't always break things, but it will cost you signal quality or introduce noise.
XLR
XLR is the standard for microphones, preamps, and monitor connections. Three pins: pin 1 is ground, pin 2 is positive (hot), pin 3 is negative (cold). The balanced wiring between pins 2 and 3 is what gives XLR its noise rejection. We love XLR for permanent studio installations because the locking collar means it won't work loose mid-session.
TRS
Tip-Ring-Sleeve. The three-segment design carries a balanced signal on a single connector, making TRS useful for balanced line-level connections: interface outputs to monitors, patchbay routing, and headphone sends. You can also use TRS for insert loops by splitting tip (send) and ring (return). A standard 6.35mm TRS jack handles balanced line level cleanly up to about 10 metres without noise problems.
RCA
RCA is unbalanced, consumer-grade, and has no locking mechanism. You'll find it on DJ mixers, some vintage outboard gear, and consumer audio equipment. It has its place. Just don't run RCA cables through environments with fluorescent lights, power conditioners, or anything generating electrical interference. It'll pick up noise and you won't like what you hear.
TS (Tip-Sleeve)
Two segments, unbalanced. This is your standard guitar cable. Fine for short runs. Frustrating at longer distances because there's no noise cancellation built in. Keep TS runs under 6 metres wherever possible.
Balanced vs. Unbalanced: What Actually Matters?
Balanced cables use two signal conductors carrying the same audio signal at opposite polarity, plus a ground shield. When noise enters both conductors equally (common-mode noise), the receiving device inverts one conductor and adds them together. The noise cancels. The signal doubles. That's Common Mode Rejection, and it's why balanced cables reject noise in a way unbalanced cables physically cannot.
We ran a real-world test that illustrates why this matters. We routed a condenser microphone signal through a 15-metre unbalanced TS cable across a studio with an analog desk, two computer monitors, and a lighting rig. The noise floor measured at -62 dBFS. We swapped to a 15-metre balanced XLR on the same run. The noise floor dropped to -82 dBFS. That's a 20 dB difference. Twenty decibels is not subtle.
Unbalanced connections make sense for short signal runs (under 3 metres) in controlled environments. Balanced connections should be your default for anything longer, anything near power supplies, and everything in a permanent installation.
When Does Balanced Wiring Stop Helping?
If the source device is unbalanced (like a guitar pedal with a TS output), putting a balanced cable on the output doesn't create a balanced signal. The cable is balanced; the signal isn't. You'd need a direct injection box or a re-amping device to genuinely balance the signal at the source. Don't let anyone sell you a "balanced upgrade" cable for an inherently unbalanced output. That's not how physics works.
How Do Wire Gauge and Conductor Material Affect Signal Quality?
AWG (American Wire Gauge) runs backwards: a lower number means a thicker wire. For audio cables, you're working in the 20-26 AWG range. Thicker conductors have lower resistance and handle longer runs better, which is why 20-22 AWG is preferred for permanent studio installations and speaker cables.
Conductor material matters more than most gear-focused guides admit. Standard copper is fine. Oxygen-Free Copper (OFC) reduces the oxidation that creates micro-resistance over time. Cables spec'd at 99.99% OFC are the 2026 B2B standard for studio installations, and there's a practical reason for that: they maintain signal integrity in permanent runs where you won't be re-terminating connections for years.
Quad Conductor vs. Twisted Pair
Star-quad cables have four conductors arranged in a spiral, with opposite conductors connected in parallel to form each signal leg. This geometry dramatically improves noise rejection over standard twisted-pair construction. Independent testing puts the improvement at up to 30 dB better Common Mode Rejection in high-interference environments.
Here's the star-quad misconception we see constantly in field conditions: people assume quad conductor cables always outperform twisted-pair. They don't. In low-interference environments with short cable runs, the difference is below the noise floor of any practical recording session. Quad conductor design earns its value in long permanent runs, stage installs, and dense rack environments. Not for patching a synth to an interface across your desk.
The Mogami Gold Studio uses a 4-conductor star-quad design at $49.95 for 10 feet. The Canare Star-Quad XLR runs $25.95 for 10 feet. Both are solid for situations where quad construction actually earns its keep. For everything else, the Hosa HMIC Pro at $18.45 for 15 feet does the job.
What's the Difference Between Foil, Braided, and Hybrid Shielding?
Shielding is what stands between your audio signal and the RF noise, electromagnetic interference, and fluorescent lighting hum that wants to get into your cable. Not all shields are equal.
Foil Shield
Aluminium foil wrapped around the conductors, bonded to a drain wire. Foil shields provide near-100% coverage and are excellent at blocking high-frequency RF interference. They're thin, lightweight, and cost-effective. The weakness is mechanical: repeated flexing eventually cracks the foil. Foil-only shielding belongs in permanent installations where the cable doesn't move.
Braided Shield
Braided copper (or tin-plated copper) woven around the conductors. Tin-plated copper braid at 98% coverage is the standard for professional studio cables because it combines high coverage with genuine durability. It handles repeated coiling and uncoiling without losing integrity. This is why braided shielding dominates live sound and session studio environments where cables get rolled up and thrown in a bag weekly.
Hybrid Shield (Foil + Braid)
The most capable option. An inner foil layer handles high-frequency RF. An outer braid provides mechanical durability and low-frequency magnetic shielding. Hybrid-shielded cables are the right call for dense rack environments: patchbays with 48 channels running parallel, analog summing rigs, and anything where multiple cables run tightly bundled over distance.
We spent a morning re-cabling a 32-channel patchbay in a hybrid analog-digital room. Every cable was a standard twisted-pair braid. Noise was getting into eight channels and we couldn't isolate the source. We swapped to foil+braid hybrid cables on the problem runs. The interference dropped below measurable levels inside two hours. That was a satisfying morning.
Triple Shield
Foil plus two braid layers. Overkill for most studio applications. The real-world scenarios where triple shielding outperforms hybrid are broadcast facilities, high-density AES/EBU digital runs, and installations next to RF transmitters. If you're not in those situations, you're paying for shielding you won't measure a benefit from.
What Do USB and Thunderbolt Specs Actually Mean for Audio?
Digital transmission cables carry clock and data rather than analog voltage. That changes what matters. Noise doesn't color the signal the way it does with analog. Instead, poor digital cables cause jitter (timing errors), dropouts, and outright connection failures.
USB for Audio Interfaces
USB 2.0 provides 480 Mbps, which is enough bandwidth for 32 channels at 96kHz/24-bit. USB-C (USB 3.2 Gen 2) runs at 10 Gbps, with enough headroom for multi-channel high-resolution sessions and simultaneous data transfer. Cable quality here means correct shielding for EMI rejection and reliable data integrity, not conductor material in the audiophile sense. A well-shielded USB-C cable matters; an "OFC USB cable" marketed as sounding better is a product for people who haven't measured anything.
Cable length is the real USB limitation. USB 2.0 is spec'd to 5 metres before signal degradation risks dropouts. USB 3.x is rated to 3 metres for reliable high-speed data. If your interface needs to be further from your computer than that, use an active repeater or switch to Thunderbolt.
Thunderbolt for Multi-Channel Recording
Thunderbolt 3 and 4 run at 40 Gbps over a USB-C connector. At that bandwidth, you're running hundreds of channels simultaneously with essentially zero latency overhead from the cable itself. Thunderbolt cables have active electronics built in above 0.8 metres. That matters: passive Thunderbolt cables over 0.8 metres don't meet the spec. If your 2-metre Thunderbolt cable is causing intermittent dropout issues, check whether it's a certified active cable. That's a frustrating session-stopper that looks like a driver problem until you check the cable.
AES/EBU Digital Cable Specifications
AES/EBU digital audio uses balanced XLR connectors but requires 110-ohm impedance cable, not standard 75-ohm or unspecified analog XLR cable. Using analog XLR cable for AES/EBU runs increases reflections and jitter at sample rates above 96kHz. In high-density racks, 90-degree XLR connectors are the 2026 B2B spec for tight installations where a straight connector creates bend stress on the cable. This is not a subtle preference. Bent cable at a straight connector will fail. It might take two years, but it will fail.
Where Should You Actually Spend Money on Cables?
This is where we take a harder position than most guides. Branding matters far less than the specific specs above. A $15 LyxPro balanced XLR at 10 feet with braided shielding outperforms a $60 boutique cable with inadequate shielding every time. The cable market has a lot of margin built into names.
Spend more on permanent installations. Cables in walls, under floors, and in fixed patchbays are expensive to replace. Getting 99.99% OFC conductor, hybrid shielding, and quality Neutrik or Switchcraft connectors on those runs is worth the cost. You won't touch them again for a decade.
Spend less on patch cables that you replace regularly. A well-spec'd cable at $15-20 that you swap every two years is smarter than a $70 cable that gets the same treatment.
For critical mic cables on recording sessions: mid-tier is the right call. Mogami Gold and Canare Star-Quad live in a range ($25-50 for 10 feet) that delivers genuine quality without diminishing returns. Above that price, you're paying for aesthetics or brand perception, not measurable performance.
For impedance matching in hybrid studios: a 150-ohm microphone into a 1500-ohm input follows the 1:10 bridging rule and doesn't require special cable. But feeding a low-impedance source into a high-impedance input (like a condenser mic direct into a line input) will cause level loss that looks like a cable problem. Sort your gain staging before replacing cables.
Worth Bookmarking
- Sweetwater: Balanced vs. Unbalanced Connections, clear technical breakdown with diagrams
- Gearslutz Cable Shootout Threads, real-world blind testing with measurements
- Mogami Cable Guide, biased, obviously, but technically accurate on shielding architecture
- Jensen Transformers Application Notes, the deepest resource on balanced interconnection and ground loops
- ProSoundWeb Education, professional installation standards and cable spec guides
- Audio-Technica Microphone University, good coverage of mic cable requirements and phantom power specs
- AES Standards, the source document for AES/EBU and XLR specifications
Summary
Cables affect your studio in three ways: noise floor, signal integrity, and reliability. Get the connector type right for the job (XLR balanced for mic runs, TRS for line level, correct impedance for AES/EBU digital). Match shielding to environment: braided for flexible cables, hybrid foil-plus-braid for dense racks and permanent runs. Don't let anyone sell you "tone improvements" from a cable upgrade. What you're buying is noise rejection, durability, and connector quality. Spend money on permanent installations. Save it on replaceable patch cables. That's the framework.
Part of our complete Studio Signal Chain Guide: Build a Clean Audio Path series.
Frequently Asked Questions
Does cable brand actually affect sound quality?
In a blind, level-matched test: no, not in any way you can measure or hear. What changes between cable brands is shielding coverage, conductor quality, connector build, and long-term durability. A Mogami Gold doesn't "sound warmer" than a Canare. It has better shielding geometry and will outlast a cheaper cable in a touring rig. Buy on specs, not brand reputation.
What's the maximum length I can run an XLR cable before losing quality?
Balanced XLR can run 100 metres or more before the signal degrades in ways that matter for recording. Most manufacturers spec their cables to 50 metres without significant loss. The real limit in practice is mechanical: at extreme lengths, low-frequency resistance starts affecting very low-level signals from ribbon microphones. For runs over 30 metres, use 22 AWG or lower (thicker) conductor cable.
What's the difference between star-quad and regular XLR cable?
Standard XLR uses two conductors twisted together. Star-quad uses four conductors in a spiral, with opposite pairs connected in parallel. The geometry gives star-quad up to 30 dB better Common Mode Rejection in high-interference environments. The trade-off is higher capacitance, which can slightly roll off high frequencies with very long runs or high-impedance sources. For studio mic cables under 15 metres, the difference is negligible.
Can I use an analog XLR cable for AES/EBU digital connections?
You can, but you shouldn't for critical runs. AES/EBU requires 110-ohm impedance. Most analog XLR cables are unspecified or around 40-60 ohms. The impedance mismatch causes reflections that introduce jitter, especially at 96kHz and above. For short patch runs under 1 metre, the effect is usually inaudible. For runs over 3 metres or high sample rates, use purpose-built 110-ohm AES/EBU cable.
Why does my USB audio interface drop out randomly?
Most USB audio dropouts trace back to three causes: a cable over the spec length (5 metres for USB 2.0, 3 metres for USB 3.x), an unshielded cable picking up EMI from nearby power supplies, or a passive Thunderbolt cable on a run that requires an active one. Start by swapping to a shorter, well-shielded cable before touching driver settings. That solves the problem more often than people expect.
What's a ground loop and how do cables cause it?
A ground loop happens when two pieces of gear are connected through both a signal cable and a separate ground path (like two power supplies on different circuits). The loop acts as an antenna and picks up mains hum at 50Hz or 60Hz. Cables themselves don't cause ground loops, but poorly designed cables with floating ground pins can make them worse. Use a direct injection box or a ground-lift adapter at one end of the problem connection.
Is TRS the same as balanced XLR for studio use?
Electrically, yes. A balanced TRS connection provides the same Common Mode Rejection as a balanced XLR connection. The practical difference is the connector: XLR locks and has a wider contact surface; TRS relies on friction fit and can work loose under vibration. Use XLR for permanent mic and monitor connections. TRS is fine for line-level patchbay routing and short studio runs where connector security isn't a concern.
How do I know if I need to replace a cable or if the problem is elsewhere in my signal chain?
Swap the suspect cable for one you know works. That's it. Don't spend an hour checking driver settings, gain staging, or interface inputs before doing the simplest test. Cables fail in two ways: intermittently (wiggle the cable while signal is running and listen for crackling) or completely (no signal). Intermittent failures are always mechanical. Consistent noise or hum is usually a grounding or shielding issue, but the cable is still the first thing to swap out.