
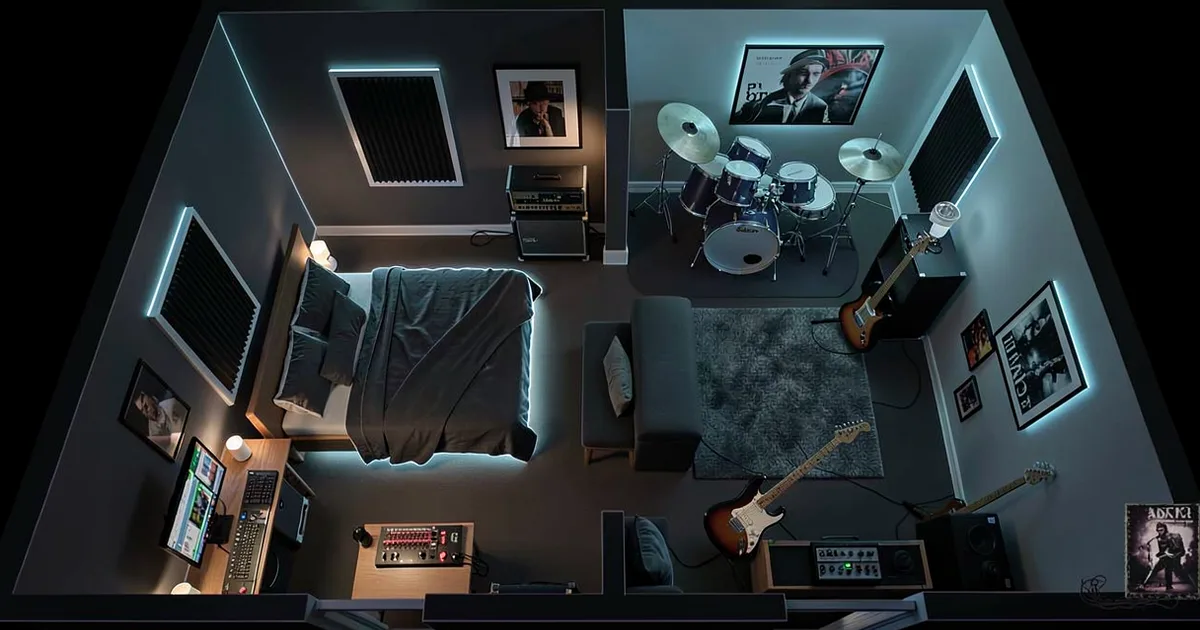
A home studio needs four things to work: a treated room, an audio interface, studio monitors, and a DAW. Get those four right and you can make professional-sounding recordings for between $500 and $2,000.
Your room is the most important piece of gear you own. Not your interface. Not your monitors. The room. Every dollar you spend on expensive speakers in an untreated space is a dollar that makes your mixes worse, not better. We've heard $3,000 monitors sound embarrassing in a bad room, and $300 monitors sound honest in a good one.
This guide covers everything you need to build a home studio that works: the room itself, acoustic treatment, gear selection at every budget, and the workflow habits that separate producers who finish records from producers who buy plugins.
We've organised it so you can jump to what you need. But if you're starting from scratch, read it front to back. The order matters.
Which Room Should You Pick?
Pick the quietest room in your building first. Then worry about its shape.
Noise floor matters more than most guides admit. A room with HVAC noise sitting at -50dBFS will ruin quiet passages and force you to gate everything. Walk each room in your space with your phone's decibel meter app. Anything below 35dB ambient is workable. Above 45dB and you'll fight it every session.
Rectangular rooms are the worst shape for acoustics. They create parallel walls, which means standing waves at predictable low frequencies. If you can choose between a square room and an L-shaped one, take the L-shape every time. Irregular walls break up reflections before they become a problem.
Aim for 8 to 12 square metres. Smaller than that and bass buildup becomes genuinely difficult to fix without treatment that costs as much as your gear. We worked in a 6 square metre room for two years. The low end lied to us constantly. We learned the hard way.
What About Ceilings?
Low ceilings (under 2.4 metres) cause flutter echo between the floor and ceiling. You'll hear it as a strange ringing on claps and snare hits. A 2.4 to 3 metre ceiling height makes treatment far more manageable. Carpet on the floor helps, but it's not a substitute for ceiling treatment if you're recording live sources.
How Much Acoustic Treatment Do You Actually Need?
In a room under 8 square metres, you need to treat roughly 50% of the surface area for a neutral sound. That's not our estimate. That's the physics of small rooms, where room modes at bass frequencies require absorption across a significant portion of the boundary surfaces to reduce their peaks below 10dB.
In a room between 8 and 12 square metres, 20 to 30% wall coverage combined with corner bass traps gets you to a reverberation time below 0.5 seconds. Below 0.5 seconds is your target. Above that and your reverbs blend into the room, your mix decisions stop translating, and you start second-guessing everything.
Start With the Corners
Bass frequencies build up in corners. Floor-to-ceiling bass traps in all four vertical corners are the single highest-return acoustic investment you can make. We installed 24-inch Rockwool 60 traps wrapped in fabric in a 10 square metre room. The 80Hz peak that had been masking our kick drum dropped by 9dB. The mix snapped into focus immediately.
Use Rockwool 60, Owens Corning 703, or similar rigid fibre boards. Acoustic foam does almost nothing for frequencies below 500Hz. It's frustrating how many home studio guides still recommend foam panels as a complete treatment solution. They're not. They're decoration that happens to reduce some high-frequency flutter.
First Reflection Points
After corners, treat the first reflection points: the spots on your side walls where sound from your monitors bounces to your ears. Sit at your mix position and have someone move a mirror along the side wall. Everywhere you can see a monitor in the mirror is a first reflection point. Put a 4-inch panel there.
The ceiling above and slightly in front of your mix position needs treatment too. A cloud panel hanging 12 to 18 inches below the ceiling works brilliantly. This kills the most damaging early reflections without making the room dead.
DIY Treatment Is Underrated
A 4x8 sheet of 2-inch Owens Corning 703 costs around $50 and yields four 2x2 foot panels. Add fabric and a wooden frame and each panel costs under $30. Four commercial panels at the same spec would run $200 to $300. The DIY version sounds identical. We've built dozens of them and they outperform the foam "studio kits" sold on Amazon at five times the price.
For room analysis before and after treatment, REW (Room EQ Wizard) is free, works with any measurement microphone, and shows you exactly which frequencies need taming. Pair it with a calibrated mic like the Dayton Audio EMM-6 ($30) and you have a proper measurement rig for under $35 total.
Worth Bookmarking
- Room EQ Wizard (REW), free room measurement and analysis software
- Amroc Room Mode Calculator, calculates room modes from your dimensions before you move a single panel
- Gearspace Studio Building Forum, the most detailed DIY acoustic treatment community online
- Sweetwater Studio Setup Hub, gear pairing guides and interface comparisons
- LANDR, AI mastering and distribution, useful for checking rough mixes against commercial references
- Sonarworks Reference 4, monitor calibration software that corrects remaining room issues after treatment
- Splice, sample and plugin rental platform, useful for testing tools before committing budget
How Do You Set Up Studio Monitors Correctly?
Position matters as much as the monitors themselves.
Form an equilateral triangle between your two monitors and your listening position. All three points equal distance apart. For 5-inch monitors in a typical home studio, that's usually 3 to 4 feet from each speaker to your ears. Tweeters at ear height. Monitors toed in so they aim at your ears, not the wall behind you.
Keep monitors at least 12 inches from the rear wall. Low frequencies pile up near walls and cause bass bumps that make your mixes sound thin when played elsewhere. If your desk is against the wall, this is frustrating but fixable: add a bass trap directly behind each monitor, or pull the desk out 18 inches.
Which Size Monitors for a Home Studio?
5-inch woofers are the sweet spot for rooms under 12 square metres. They extend down to around 60Hz, which covers the range where most mix decisions live. Going larger in a small room without serious treatment gives you more low end to deceive you.
The PreSonus Eris E5 XT sits around $200 a pair and is honest enough to work from. The Yamaha HS5 is our preferred budget workhorse: its slightly hyped high-mids reveal harshness you'd otherwise miss. The Adam Audio T5V is a clever choice if you want a ribbon tweeter's transient detail at $200 per speaker.
For headphones as a secondary reference, the Sony MDR-7506 is the most reliable $100 you'll spend. The Beyerdynamic DT 900 PRO X gives you more detail for critical listening at around $300. We love the Sennheiser HD 650 for long sessions: comfortable, forgiving on the ear without hiding real problems in a mix.
What Audio Interface Do You Need?
Your interface converts analog sound to digital and back. Quality here affects everything that goes into and out of your DAW.
The Focusrite Scarlett 2i2 (4th generation) is the correct answer for most people starting out. Two inputs, low-latency drivers, converters that hold up to professional scrutiny. Around $170. We'd buy it ourselves. We have bought it ourselves, more than once.
Step up to the Universal Audio Volt 2 at around $200 for a vintage preamp mode that adds harmonic saturation. Not technically cleaner than the Scarlett. But satisfying in a way that makes tracking vocals more enjoyable. That matters for long sessions.
If you're building around the Apollo ecosystem, the Apollo Twin X starts around $900. The onboard UAD DSP processing runs UAD plugins without taxing your CPU. That's a real advantage when you're tracking with hardware-quality compression and reverb at near-zero latency. But it's only worth the price if you'll use the UAD plugin library. Otherwise the Scarlett sounds just as clean for less than a quarter of the cost.
Computer Specs That Actually Matter
16GB RAM is the floor for modern production. 32GB is better if you run orchestral libraries or heavy Kontakt sessions. Storage speed matters more than most producers realise: your sample library drive should be a 500MB/s+ SSD. A spinning hard drive under sample playback causes dropouts and xruns that look like interface problems but aren't.
CPU matters for native processing. An Apple M2 or M3 chip handles more simultaneous plugins than most Windows machines at the same price point. If you're on Windows, an AMD Ryzen 7 or Intel Core i7 from 2022 onwards handles most sessions without strain. We run 80-track sessions with full processing on an M2 Mac mini with 16GB. It doesn't break a sweat.
How Do You Build a Hybrid Workflow?
The best-sounding studios we've worked in all use the same strategy: do the thinking in the box, do the feeling through hardware.
That means using your DAW for arrangement, editing, and plugin processing, while routing through one or two analog pieces for character. A single hardware compressor on your mix bus can do more for a record's feel than six software compressors. We ran a Warm Audio WA-2A on our mix bus for three months. Every client noticed something different about the records without knowing why. That's what good hardware does.
The workflow is simple. Record at 24-bit/48kHz. Edit and arrange in the box. For the final mix, print stems through your hardware chain using your interface's analog outputs. Re-import the printed stems. Finalize in the DAW. You get the flexibility of digital with the character of analog.
AI Tools Worth Knowing in 2026
LANDR's AI mastering has gotten precise enough that we use it for quick reference checks: bounce a rough mix, run it through LANDR, and compare how your low end translates against a processed version. It's not replacing mastering engineers. But it's useful for catching problems before you've gone too far down a mix.
Izotope's RX continues to be brilliant for dialogue and acoustic treatment gaps: if your room has some flutter you haven't fixed yet, RX's spectral repair can clean up recordings that would otherwise be unusable. It's a clever workaround while your treatment budget catches up with your recording schedule.
What's the Right Budget Allocation?
Here's where most advice gets it wrong. People spend 70% of their budget on gear and 10% on the room. We'd flip that.
At a $1,000 total budget, our split would be: $300 on acoustic treatment (DIY panels and corner traps), $170 on a Scarlett 2i2, $200 on monitors, $100 on headphones, $100 on a DAW or DAW subscription, $130 on mic and cables. That's a functional, honest studio.
At $2,000, add better monitors (Yamaha HS5 or Adam T5V), upgrade to a hardware mic preamp, and invest more in bass trap coverage. The core signal chain stays similar. The room gets more love.
Spending $5,000 and above is where you start buying a second audio interface for more channels, hardware outboard, a proper monitoring controller, and room mode correction software like Sonarworks Reference 4 ($99/year) to calibrate your monitors to the actual measured response of your room.
Summary
Build the room before you buy the gear. Corners first, first reflections second, measure with REW throughout. Form the equilateral triangle with your monitors at ear height. Start your signal chain with a Focusrite Scarlett 2i2 and scale up when you outgrow it. Match your computer to the demands of your sessions: 16GB RAM and an SSD for sample libraries. Use a hybrid workflow when you're ready: track in the box, print through hardware for character. And resist the pull of expensive gear until your room tells you the truth.
Part of our complete Studio Signal Chain Guide: Build a Clean Audio Path series.
Frequently Asked Questions
What's the minimum budget for a usable home studio?
You can build a functional recording setup for around $500 if you're disciplined about priorities. That means a Focusrite Scarlett Solo ($120), a pair of budget monitors or quality headphones ($100), a condenser mic ($80), basic acoustic treatment using DIY panels ($100), and a free DAW like Reaper (paid license $60) or GarageBand. It won't compete with a $5,000 rig. But it will capture ideas cleanly and let you learn without gear excuses.
Do I really need acoustic treatment if I'm just making beats?
Yes. Low-end decisions are where untreated rooms hurt most. If your room has a 10dB peak at 80Hz, you'll consistently mix your kick and bass too thin trying to compensate. That means your music sounds weak on other speakers. Treatment isn't just for recording vocals. It's for trusting any mix decision you make.
What's the difference between acoustic panels and soundproofing?
Acoustic panels control reflections inside the room. Soundproofing stops sound from entering or leaving the room. They're completely different problems requiring completely different solutions. Most DIY acoustic foam and panels do almost nothing for soundproofing. True soundproofing requires mass and decoupling: dense materials and floating structures that break the path sound travels through a building.
How do I know if my monitors are positioned correctly?
Measure from the front face of each monitor to your ears. Those distances should match. Then measure between the two monitors: that distance should also match the monitor-to-ear distance. Tweeters should be within 2 inches of ear height when seated. If your low end sounds uneven, try moving the monitors forward or backward 6 inches at a time and remeasure with REW.
Can headphones replace monitors in a home studio?
Not fully, but they're a useful second reference. Stereo imaging and low-end translation behave differently on headphones versus speakers. We mix on monitors and check on headphones before finalising any decision. The Sony MDR-7506 is our go-to check: if something sounds wrong there, it'll sound wrong everywhere. Plugins like Waves NX or Slate VSX try to simulate speaker listening on headphones. They help. They're not a replacement.
What sample rate and bit depth should I record at?
Record at 24-bit/48kHz for almost everything. You get a noise floor around -144dBFS (versus -96dBFS at 16-bit), which gives you real headroom when gain staging. 96kHz offers no audible advantage for most production work and doubles your file sizes and CPU load. 44.1kHz is fine for music destined only for streaming, but 48kHz gives you better compatibility if your material ever goes to video or broadcast.
How do I deal with a very small room under 6 square metres?
Small rooms need aggressive corner treatment on all four vertical corners and both horizontal corner junctions (where ceiling meets walls). At this size, a room mode calculator like Amroc will show you the worst-offending frequencies before you start. Target those first. Sonarworks Reference 4 to digitally correct the remaining peaks after physical treatment is done. Working only ITB using headphones for reference checks becomes more practical at this room size than fighting bad acoustics on monitors.
Is a dedicated DAW computer better than a general-purpose machine?
Dedicated is better, but not because of the hardware. It's about software discipline. A machine with no browser, no antivirus scanning during sessions, no background sync services, and properly configured audio buffers will outperform a more powerful general-purpose machine running 20 background processes. If you must use one machine, create a separate user account with everything non-audio disabled and switch to it before every session.