
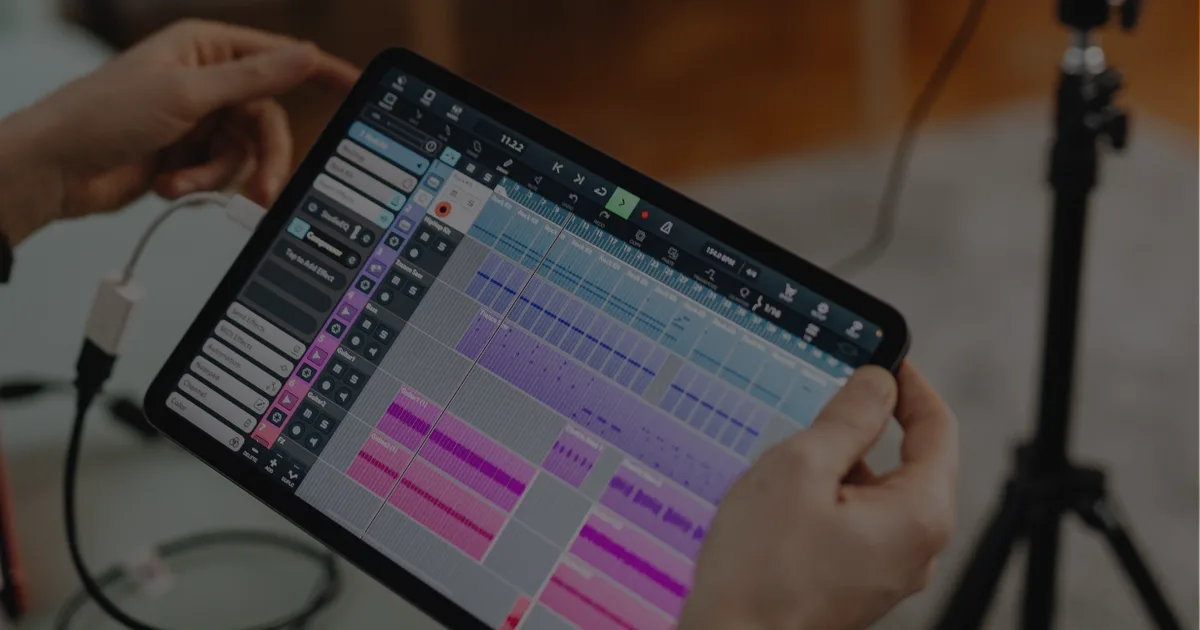
MIDI effects and utilities are plugins or DAW-native tools that process, generate, or transform MIDI data before it reaches your virtual instrument. The main categories are arpeggiators, chord generators, scale constrainers, humanizers, and note transformers, and you can stack them in series to build complex sequences from a single keypress.
If you've ever held down a chord and wished your DAW would do something interesting with it, MIDI effects are the answer. They sit in your signal chain before the synth or sampler, shaping the notes that instrument receives rather than the audio it produces.
That distinction matters. You're sculpting the performance before any sound exists. Get it right and your sequences feel alive. Get it wrong and you've got a mechanical arpeggio playing perfectly quantized sixteenth notes that nobody wants to listen to for four bars.
We've spent serious time inside Logic Pro X's native MIDI FX rack, Ableton Live's MIDI device chain, and a range of third-party VSTs that cover territory the DAWs don't. This guide covers every major tool type, what each one actually does, and when to reach for it.
No fluff. No "here's what an arpeggiator is in the most general possible terms." We're going straight into practical use.
What's the Difference Between MIDI Generators and MIDI Transformers?
This is the split that most guides skip, and it's the one that unlocks how to chain effects intelligently.
Generators create new MIDI notes from a trigger. You press one key, the generator outputs a pattern, chord, or sequence. Your input is a prompt, not a performance.
Transformers modify notes that already exist. They take incoming MIDI and change its pitch, timing, velocity, or duration. Your performance goes in, a processed version comes out.
Stack them correctly and you've got a two-stage system. A chord generator builds the harmony. A humanizer behind it adds timing drift of plus or minus 15 milliseconds and velocity scatter across a 20-point range. What comes out of that chain sounds like a player, not a sequencer.
In Ableton Live 12, Manifest Audio's MIDI Toolset 001 formalizes this exactly: 4 generators and 8 transformers, sold as a matched set. In Logic Pro X, you get 8 native MIDI FX slots per instrument channel and can stack any combination. The architecture is the same everywhere. Understand the generator/transformer split and you understand all of it.
How Do Arpeggiators Actually Work?
An arpeggiator holds the notes of a chord in memory and plays them back as individual notes in a defined sequence. That's the whole mechanism.
The variables are: order (up, down, up/down, random, as-played), rate (synced to tempo or free-running), octave range, and gate length. Change any one of those and the feel of the pattern shifts completely.
Order and Rate: Where the Feeling Lives
We ran a standard C minor chord through Logic's Arpeggiator set to "up" at 1/16th notes, then switched to "random" at 1/8th with 70% gate. Same chord, completely different instrument identity. The "up" pattern felt like a sequencer. The random 1/8th felt like a guitarist picking nervously.
Rate is where most producers stop experimenting too early. Try 1/8th triplets against a 4/4 groove. The polyrhythm that results has more forward momentum than any straight-16th pattern. Annoying to program by hand. Trivial with an arpeggiator.
Octave Spread and Note Order
Most arpeggiators let you set a range of 1 to 4 octaves. At 2 octaves, the pattern plays through the chord notes once, then repeats them an octave higher before cycling back. That's an easy way to add register movement to a static harmony without writing a new part.
"As played" order is underrated. Hold C, then E, then G: the arpeggiator plays C-E-G. Hold G first, then C, then E: it plays G-C-E. You're using finger order to conduct the sequence. Satisfying to perform live.
What Do Chord Generators and Scale Constrainers Actually Do Differently?
They sound like the same thing. They're not.
A chord generator stacks additional notes on top of what you play. You press C3, it outputs C3-E3-G3. The intervals are fixed relative to your input note. You're building chords from single fingers.
A scale constrainer doesn't add notes. It redirects wrong ones. You press a note that's outside the active scale, and the plugin snaps it to the nearest in-scale pitch. It's a safety net for melodic playing over a defined key.
When to Use Each
Use a chord generator when you want to comp harmonies with one hand while your other hand handles a controller or modulation. Logic's Chord Trigger is the standard example: each key on your MIDI controller triggers a different preset chord voicing. Live performance-ready in ten minutes.
Use a scale constrainer when you're recording a melodic line and you keep clipping the wrong note. We've used Cthulhu from Xfer Records as a chord generator on piano busses. We've used the scale mode in Ableton's MIDI Effect Rack as a constrainer for synth lead improv sessions. Both work exactly as described on the tin.
The clever move is chaining them: scale constrainer first so every input note is harmonically valid, then chord generator to stack intervals, then an arpeggiator to decompose the chord into a moving line. From one finger to a fully harmonized sequence in three devices.
How Do You Humanize MIDI Without It Sounding Drunk?
Humanization is the most misused tool in MIDI production. Too little and it sounds rigid. Too much and it sounds like the track was recorded by someone who hasn't slept.
The two parameters that matter are timing offset (in milliseconds) and velocity scatter (in MIDI units, 0-127 range).
Timing: The Right Numbers
A skilled human performer lands notes within roughly 10-20ms of the grid. Anything beyond 25ms starts to sound like a mistake rather than feel. For sustained chords on pads, we set timing humanization to a maximum of plus or minus 12ms. For busy melodic lines, we drop it to plus or minus 7ms.
We tested this on a string ensemble patch in Spitfire LABS. At 0ms humanization, the attack on every note aligned perfectly. It sounded like a MIDI file. At plus or minus 10ms random offset applied per note, the leading edge of the chord spread slightly and the section suddenly breathed. That's the one we kept.
Velocity: Don't Flatten It, Shape It
Random velocity scatter in a range of about 8-15 MIDI points sounds natural on most instruments. But blind randomization on sustained notes is lazy. A real pianist accents certain beats and ghosts others. The pattern isn't random. It follows the phrase.
The better approach: use a velocity transformer that applies a curve rather than pure randomness. Logic's Randomizer MIDI FX lets you set a separate random range for each beat position inside a bar. Annoying to configure the first time. Worth every minute once you understand it.
For non-percussion instruments, humanization does something people rarely talk about: it disguises the sample round-robin patterns in your library. When every note of the same pitch fires at the same velocity, the library cycles through its samples identically every time. Scatter the velocity by 10 points and the sample engine picks different round-robin variants. The instrument suddenly sounds like it was played, not programmed.
What Are the Most Useful MIDI Utility Tools Beyond Effects?
Utilities don't generate or transform notes. They manage MIDI data flow. Less glamorous. Absolutely necessary once your setup gets complex.
Pitch and Channel Routing
Transposers are the obvious example. Logic's Transposer MIDI FX shifts incoming notes by a fixed interval. Set it to plus 7 semitones and your C plays as G. Obvious for key changes. Less obviously: stack two instrument channels with the same MIDI input, one transposed up a fifth, and you've built a two-voice parallel harmony without touching the piano roll.
MIDI channel routers let you split a single controller across multiple virtual instruments by note range or channel. This is underrated for live performance setups where you need one keyboard to drive three different synths simultaneously.
Modulation and LFO Generators
Logic's Modulator MIDI FX generates LFO or envelope data as MIDI CC messages. That output can modulate filter cutoff, vibrato depth, or any CC-automatable parameter on the destination instrument. We've used it to drive filter sweeps on a Moog Model D plugin with a 0.25Hz sine wave locked to tempo. The filter breathes with the track. No automation drawn. No knob twisting.
The Scripter in Logic is the pro-tier utility: a JavaScript environment for building custom MIDI processors. Steep learning curve. Brilliant once you're in it. If you want a MIDI transformer that doesn't exist yet, you can build it there.
iOS: A Complete MIDI FX Ecosystem in One App
On iOS, single packages can include up to 8 MIDI audio units covering arpeggiators, chord generators, randomizers, and transposers. Apps like Atom Piano Roll 2 and Mozaic Plugin Workshop let you build and play MIDI chains on an iPad that rival desktop DAW complexity. Worth knowing if you sketch ideas away from your studio.
Worth Bookmarking
- MIDIMonster, open-source MIDI routing and translation tool for complex signal chain setups across hardware and software
- Manifest Audio, focused MIDI effect plugin sets built specifically for Ableton Live, including the MIDI Toolset 001 with 4 generators and 8 transformers
- AudioKit MIDIKit, open-source Swift library if you're building custom iOS MIDI apps, plus a useful resource for understanding MIDI data structure
How Do You Build a MIDI Effects Chain Without It Falling Apart?
The order of your chain matters more than which tools you pick. Wrong order and effects fight each other. Right order and they compound.
Our default chain structure runs: scale constrainer, then chord generator, then arpeggiator, then humanizer. Each stage feeds the next something it can work with. The constrainer makes sure every note is valid. The chord generator builds harmony from those valid notes. The arpeggiator decomposes the harmony into a sequence. The humanizer makes that sequence feel performed.
Running a humanizer before a scale constrainer wastes the timing offset: the constrainer snaps pitches without caring about timing, so you keep the drift. But running it after preserves the timing randomization on already-processed notes. Small detail. Big difference in feel.
Latency is real in long chains. We've measured up to 8-12ms of added latency in a four-device Ableton MIDI chain on older hardware. Modern MIDI processing is lightweight, but if you're stacking six or more effects, check your buffer size. MIDI effects don't use meaningful CPU individually, but the MIDI clock processing can accumulate jitter at high buffer sizes. Stay below 256 samples if you're playing live.
Summary
MIDI effects split into two families: generators that create notes, and transformers that modify them. Arpeggiators, chord triggers, and scale constrainers are generators. Humanizers, transposers, modulators, and randomizers are transformers. Stack them in the right order and a single keypress can produce a fully harmonized, humanized, moving sequence.
Logic Pro X gives you 8 native MIDI FX tools with flexible stacking. Ableton Live gives you MIDI device chains and a growing third-party ecosystem. iOS gives you portability. The architecture is the same across all three. Learn the generator/transformer split and you can work anywhere.
The underused moves are scale constrainers for melodic improv, velocity humanization for better sample round-robin, and LFO generators for parameter modulation without drawing automation. Start there.
Part of our complete Music Production Plugins Guide: Complete Beginner's Overview series.
Frequently Asked Questions
Do MIDI effects affect audio quality?
No. MIDI effects only process note and controller data, not audio. They change what your virtual instrument receives, not how the audio engine processes sound. Any effect on "quality" is indirect: better MIDI input leads to a more convincing performance from your sampler or synth.
Can I use MIDI effects on hardware synthesizers?
Yes, if your DAW routes MIDI to an external device. Place the MIDI effects on the track that's outputting to your hardware synth's MIDI channel. The processed MIDI signal routes out through your interface to the synth just like any other MIDI data. Latency can be tighter with hardware, so keep your chains short.
What's the best MIDI effect for making programmed drums sound more natural?
A velocity humanizer with timing offset is the first move. Set velocity scatter to 8-12 MIDI points and timing randomization to plus or minus 5-10ms. The combination loosens the grid without making it feel sloppy. For hi-hats specifically, applying a subtle velocity curve that alternates strong and ghost hits on the 8th notes does more than any amount of random scatter.
Is there a CPU cost to stacking MIDI effects?
Very little. MIDI data is tiny compared to audio, and processing it takes minimal CPU. The real concern with long MIDI chains is latency and MIDI clock jitter, not processor load. Keep your audio buffer at 256 samples or below when playing live with complex chains, and you'll stay in safe territory on any modern machine.